
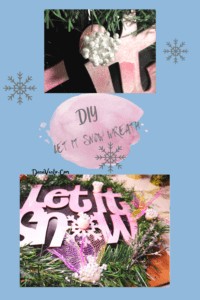
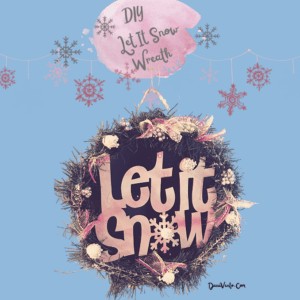
DIY Let It Snow Wreath For The Whole Winter Season
Don't let the timing of this project shy you away. You will be spray painting a few items and you need to allow them to dry. It is not ACTiVE time, it is the drying time that is listed.
Yield: 1 Winter Wreath 15"
Materials
- Glue Gun & Glue
- Wreath Frame dollar stores ($1)
- Leftover Garland or pieces of swag
- Wooden Sign 'Let It Snow' from a dollar store $
- Styrofoam pieces from shipped packages is what I used
- Vase Filler from the previous project but also available at the dollar stores
- Pink Spray Paint or any color, blue, purple, etc
- One Pizza Pan dollar store or one you don't use ($1)
- Pieces of metallic ribbon or bow you have
- Sprigs from old wreaths or previous projects that sparkle
- **Optional** Matte Clear spray paint
Instructions
- First, spray paint your pizza sheet black.

- Then Paint the Let It Snow Sign in Pink.
- Allow them both to dry before attempting to handle.
- For the Let It Snow In Pink, I marbled it with some Metallic exterior paint as well about 2 hours after painting it pink to have it shimmer more like the snow.
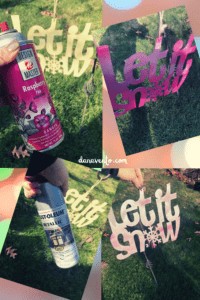
- Allow this to dry several hours and follow with clear matte spray if you are choosing to add clear spray.
- Otherwise, allow the painted pan to set up to 24 hours before handling.
- Gather your supplies so they all are within reach of you and your glue gun.
- Invert the pan and place it inside the wreath frame.
- The Wreath frame will be right side up, and the pizza pan will be inverted with the painted side LOOKING at you.
- See the video and images in the post to understand.
- Now glue the pan to the wreath frame.
- Next, it is time to add the garland or swags to the exterior of the frame.
- Wrap one layer on the outermost part of the frame, using the frame as your guide for wrapping.
- Along the way, twist it between the frame and the exterior (refer to images) and also add a few dabs of hot glue to make sure it is secure.
- Use more of the garland on the interior to trim and hide the frame.
- Before installing the Let It Snow sign in the middle of the pan, do a test run for placement.
- Once you are satisfied, glue the back of the sign and then place it CENTERED ON THE PAN.

- Next, I added some glitter sprigs I had, hot gluing them for a pop of glistening silver.
- Because it might look sparse depending on the garland you used you can either add more garland or swags or just add these sprigs.
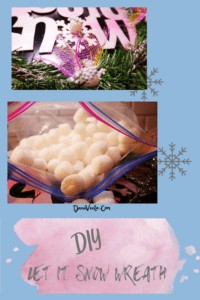
- Then I took these little styrofoam balls and lightly covered them with hot glue (on low) then dipped them into a cup that had vase filler glitter balls to make it look like glistening snow.
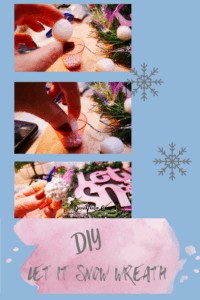
- After I then glued those onto the wreath and the Let It Snow Sign.
- On the Let It Snow sign, I attached one ball to dot on the letter 'i" & on in the middle of the snowflake.
- Then, take some metallic bow in about 3" pieces by 2"W and scrunch them, using them as fill-in different areas around the wreath for color pops and to tie in the pink Let It Snow Sign.
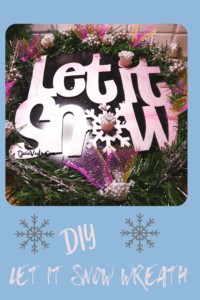
- Last I added Twine on the back as a means to hang and disguised it with a pink pearl-like necklace crafting item I had left from making a Hot Air Balloon.
- Using a wreath hanger, hang on a door and ENJOY ~ Dana XO
Notes
To hang you could use sparkle pipe cleaners, or leave the twine as it.
You could even use ribbon (stronger than party ties, but like metallic with a wire in it)
Do try to coordinate the Let it Snow Sign with the ribbon to pull it altogether