Deliciously Colorful and Easy-to-Make Summer Patriotic Red White Blue Thumbprint Cookies
Indulge in the delightful flavors of our Patriotic Red White Blue Thumbprint Cookies. Get the summer thumbprint cookies recipe now and impress your guests with these colorful treats. Let the baking adventure begin!

Are you ready to embark on a baking adventure that will leave your taste buds craving more? Look no further than these vibrant and enticing Summer Patriotic Red White Blue Thumbprint Cookies!
With their vivid colors, simple preparation, and mouthwatering flavors, these cookies will surely be a hit at any summer gathering, be it a picnic, BBQ, or special holiday celebration like Memorial Day, Fourth of July, or Labor Day.
Let’s dive into the delightful world of these delectable treats and discover why they deserve a special place on your dessert table.
Table of Contents
Why You’ll Love This Red-White Blue Thumbprint Cookie Recipe
- Fast, Easy, and Colorful: This recipe requires only four ingredients, making it a breeze to whip up. The vibrant red, white, and blue colors create a visually stunning dessert that will captivate everyone’s attention.
- Perfect for Patriotic Picnics: These cookies are perfect for those red, white, and blue picnics we all love celebrating during the summer.
These fun patriotic thumbprint cookies easily add color to your spread and showcase your patriotic spirit. - A Fan Favorite Dessert: These thumbprint cookies taste divine and are visually appealing. Their berry blue flavor elevates the overall experience, leaving you craving more with each bite.
- A Simple Solution for Summer Desserts: STOP Wondering what desserts to make for your summer holidays. Look no further! These patriotic thumbprint cookies are the answer to your question. They are simple to make, require minimal ingredients, and are guaranteed to impress your guests.
- Make-Ahead Option: You can easily prepare these cookies beforehand, allowing you to focus on other preparations for your summer gathering. Store them properly, and they will be ready to dazzle your taste buds whenever you desire.
- Easy to Transport: These cookies transport easily whether you can pack them up without worrying about any mess or damage.
- Kid-Friendly Delight: Engage your little ones to have them help you with the rolling process. Rolling the dough and creating the thumbprint indentations can be a fun activity for children, making these cookies an excellent choice for a family baking adventure.
Equipment Needed to Make Patriotic Red White Blue Thumbprint Cookie Recipe
You don’t need fancy or specialized equipment to create these delightful cookies.
Here’s a quick list of what you’ll need:
- Cookie sheets
- Parchment paper
- Mixer (or can be mixed by hand)
- Spatula
- Spoon
- Oven
- Three small mixing bowls
- Two forks or small spoons
- Plastic bag (optional)
- Small bowl
- Measuring cup
Now you see the list of what you need, gather the supplies, and let’s begin so you can discover the secrets behind these perfectly baked thumbprint cookies.
Ingredients for Your Summer Patriotic Red White Blue Thumbprint Cookies
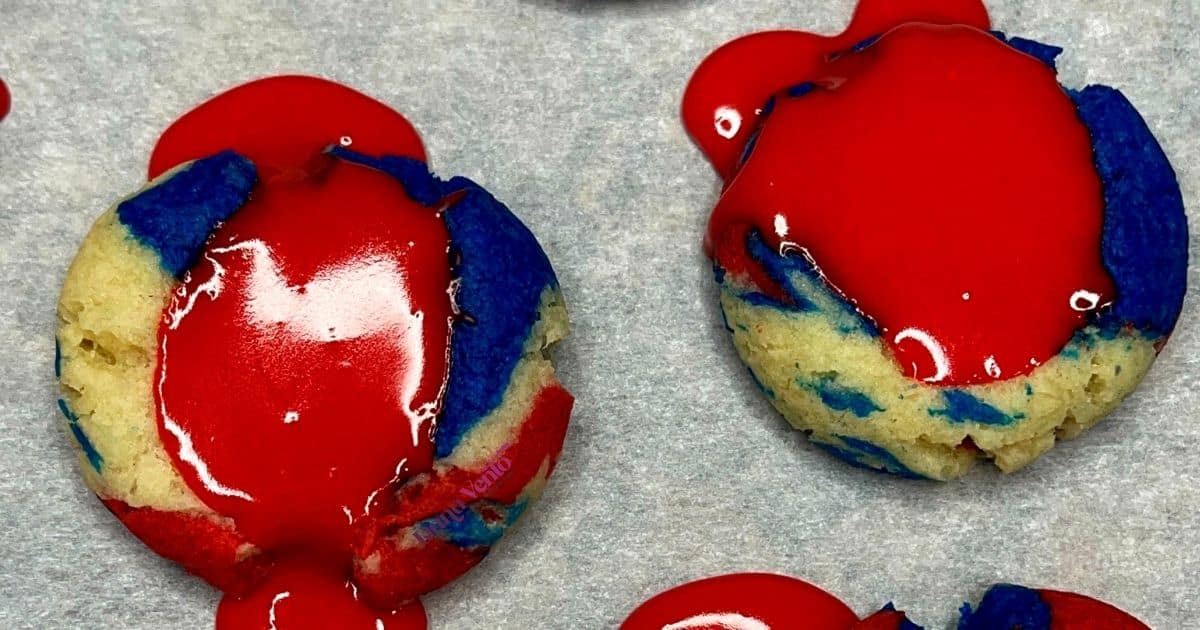
Creating these delectable Patriotric red white blue thumbprint cookies is a breeze, thanks to the simple yet fail-proof ingredients list.
Gather the following items for this patriotic summer dessert recipe:
- White cake mix
- Food coloring (red and blue)
- Berry Jello
- Flour
- Egg
- Butter
- Confectioner’s sugar
- Water (milk or cream)
- Additional food coloring
How to Make Summer Patriotic Red White Blue Thumbprints
Prepare for a baking journey filled with delightful colors and mouthwatering flavors. Follow these simple steps to create the perfect patriotic summer red white blue thumbprint cookies.
Step 1: How to Mix the 4-Ingredient Summer Dessert Recipe Thumbprints
Combine the eggs and soften the butter in a large mixing bowl. Mix them until well combined. Then, add the cake mix and flour to the bowl. Continue mixing until the ingredients are fully incorporated.
Step 2: Creating the Flavored Berry Blue Thumbprints Summer Dessert Recipe
For an extra burst of flavor, it’s time to add the berry blue gelatin. While this step is optional, it takes the recipe to the next level, adding a unique and enticing taste to the cookies. Mix in the gelatin until well combined with the dough.
Step 3: Dividing the Summer Dessert Recipe (Thumbprint Batter)
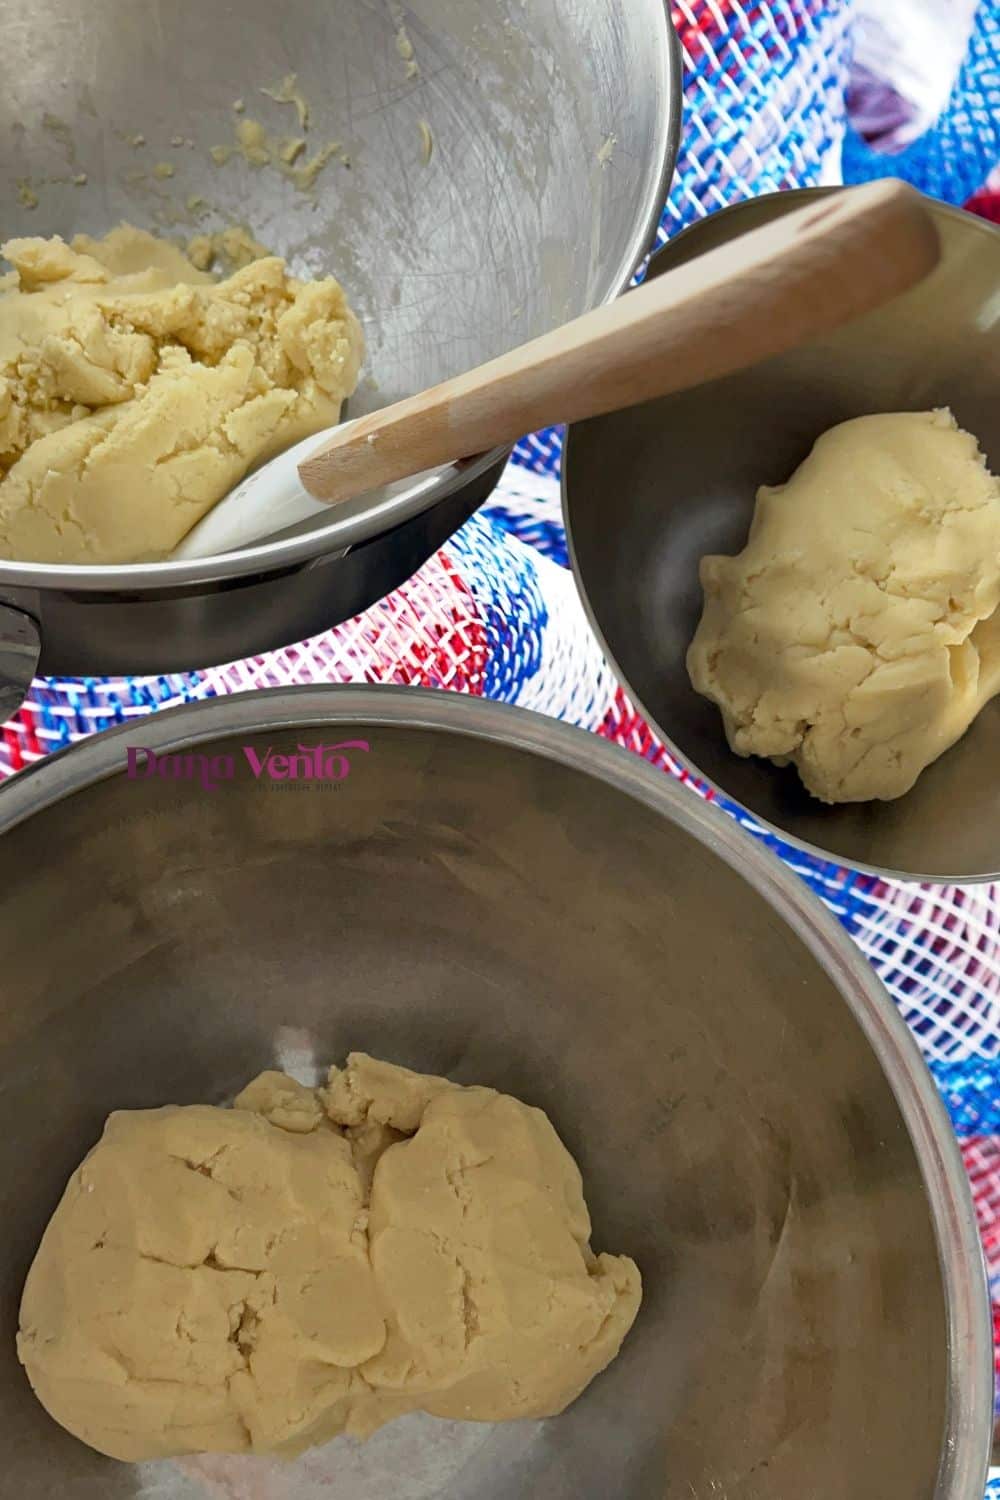
You’ll need to portion the batter into three separate bowls.
One portion will remain white, while the other two will be colored red and blue, respectively.
To achieve this, remove one portion of the batter, and set it aside in a separate bowl.
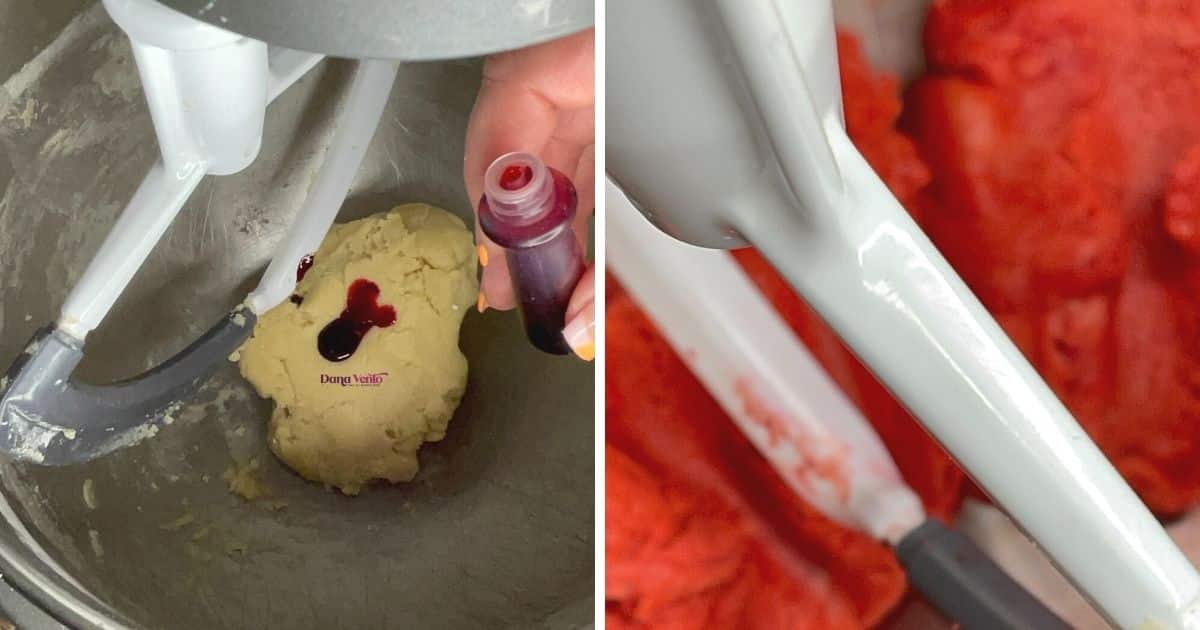
Next, Add red food coloring to one portion and blue food coloring to the other. Mix each portion until achieving the desired color.
Step 4: How To Make Colorful Patriotic Red White Blue Thumbprint Cookies Dough Before Rolling
Working with one portion at a time, mix the red dough just enough to distribute the color evenly. Repeat the process for the blue dough. Do not over-mix the dough, or you will make it dry and difficult to work with.
Step 5: Patriotic Dough Balls For The Summer Dessert Recipe
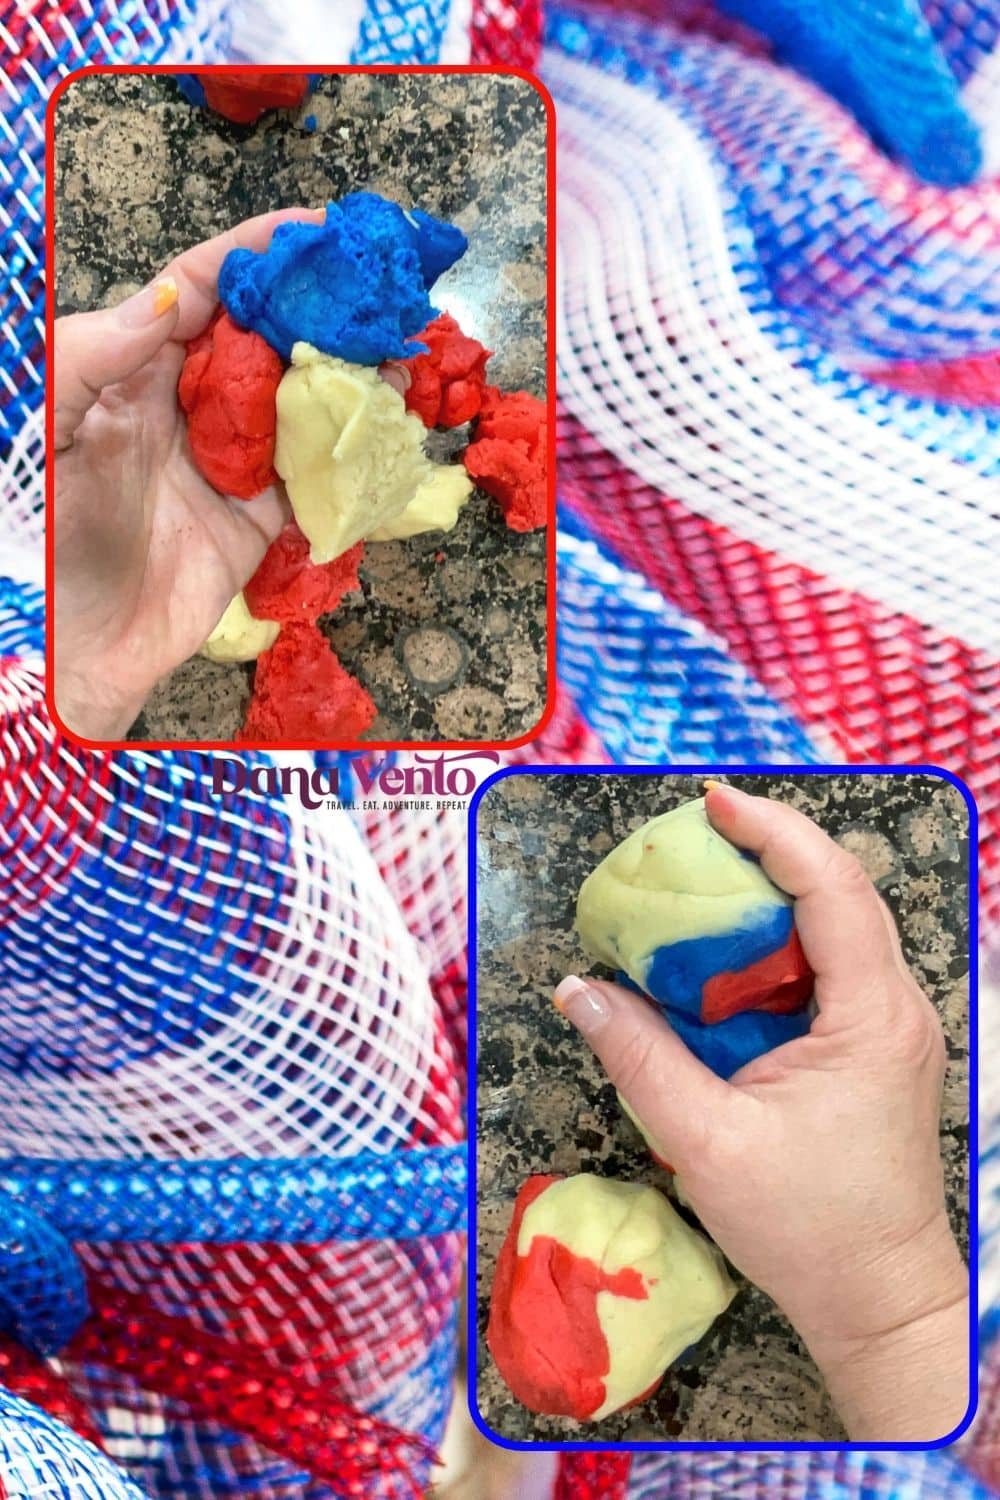
Take a teaspoon-sized portion from each colored dough—red, white, and blue—and roll them together to form a larger multicolored dough ball.
Once you have the giant dough ball, pinch off teaspoon-sized portions and roll them into more petite red, white, and blue patriotic dough balls.
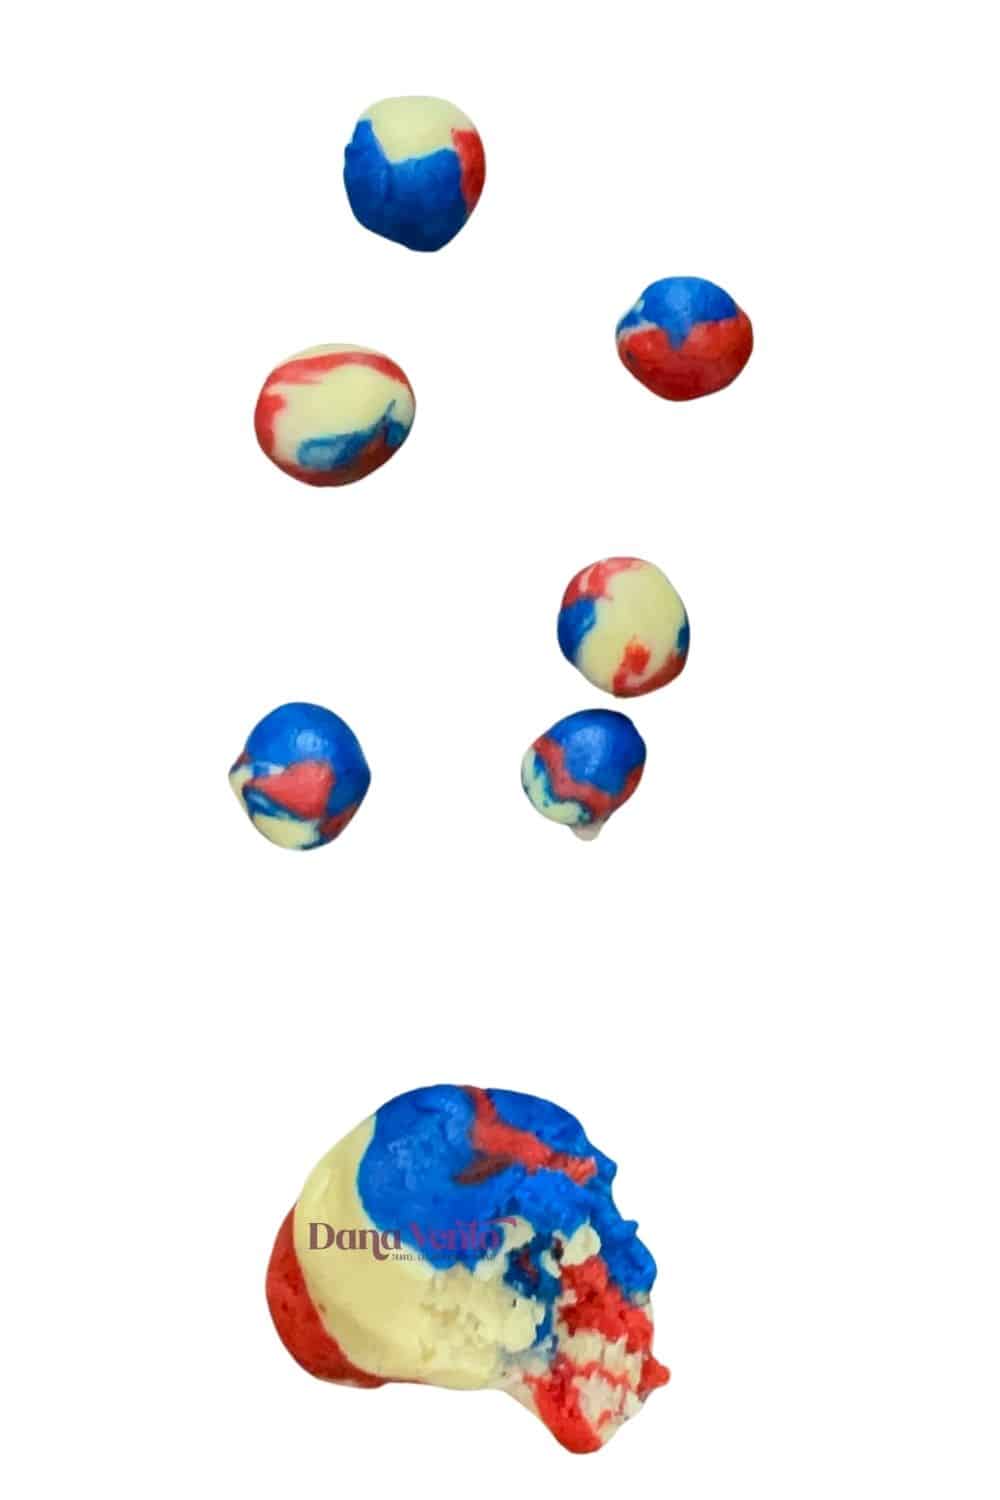
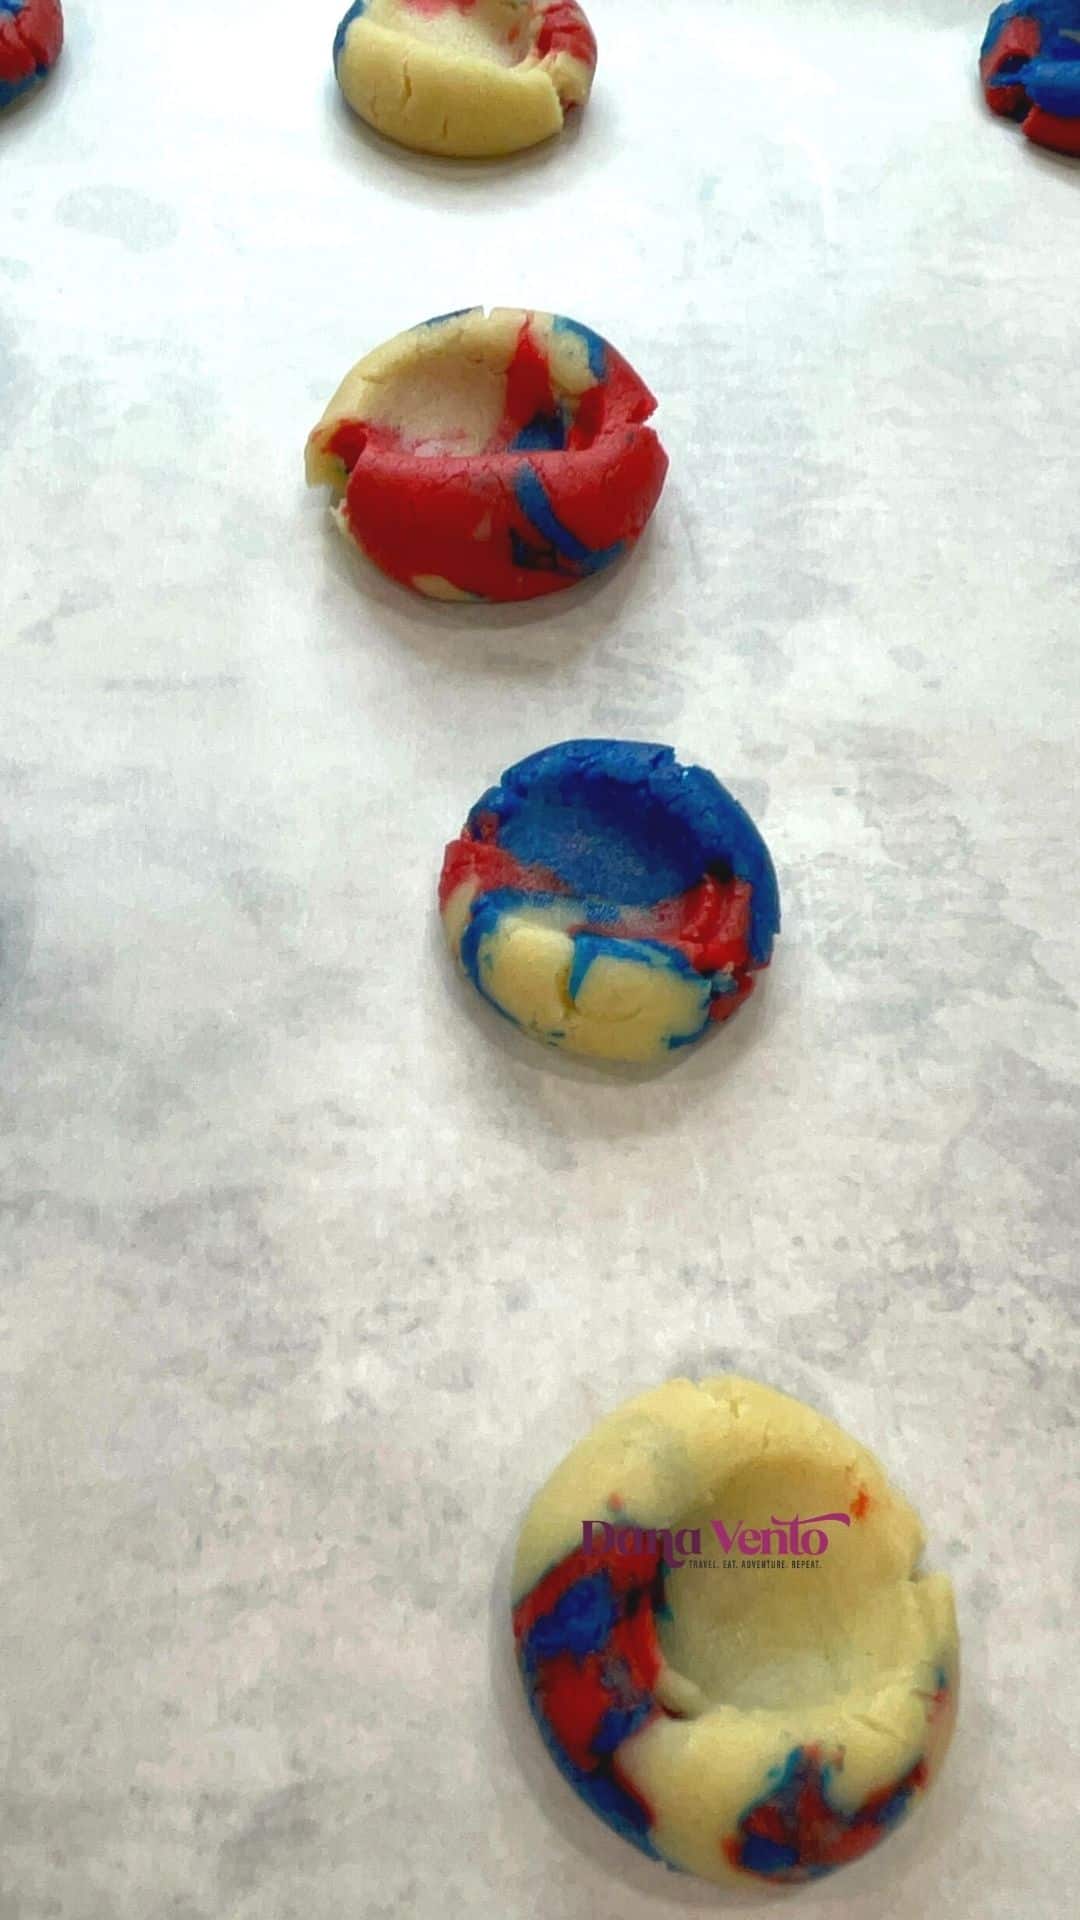
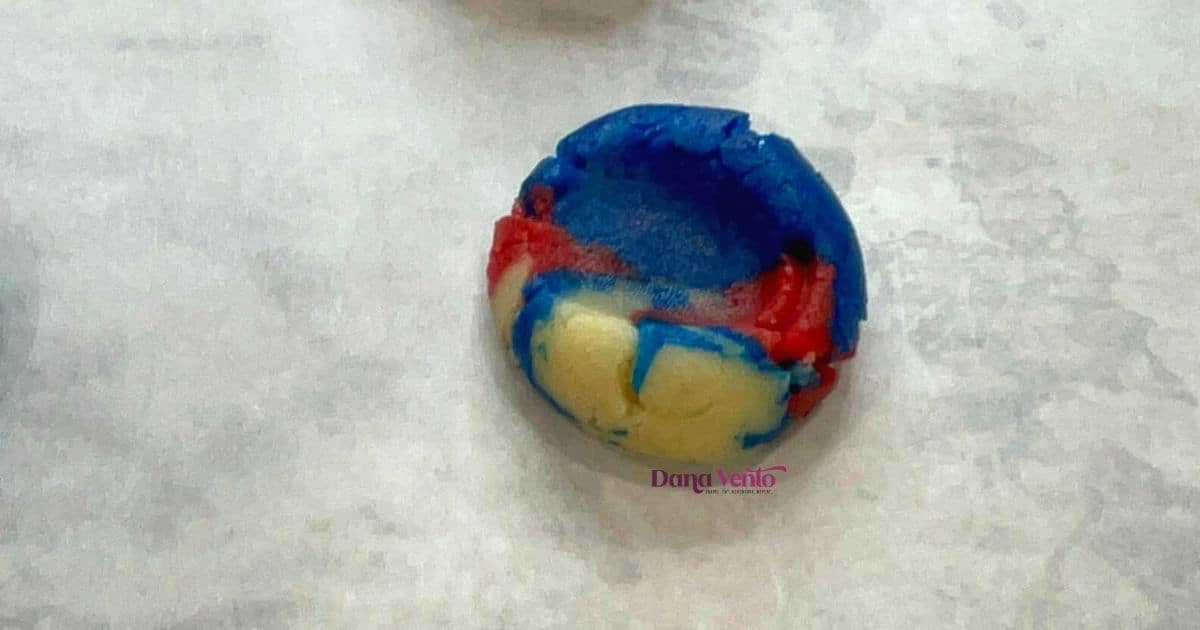
Place these dough balls onto a parchment-lined baking tray and press the center to create an indentation. Voila! You have your indented and filled patriotic red white blue thumbprint cookies!
Step 6: Bake the Patriotic Thumbprint Summer Dessert Recipe
Preheat your oven to 350°F. Place the tray of patriotic thumbprint cookies into the oven and bake for approximately 8 minutes.
Keep a close eye on them to avoid overbaking. Once baked, remove the cookies from the oven and allow them to cool on a wire rack.
The Perfect Icing Filling for Your Thumbprint Cookies
Elevate the taste and appearance of your cookies by filling the indented centers with delicious icing.
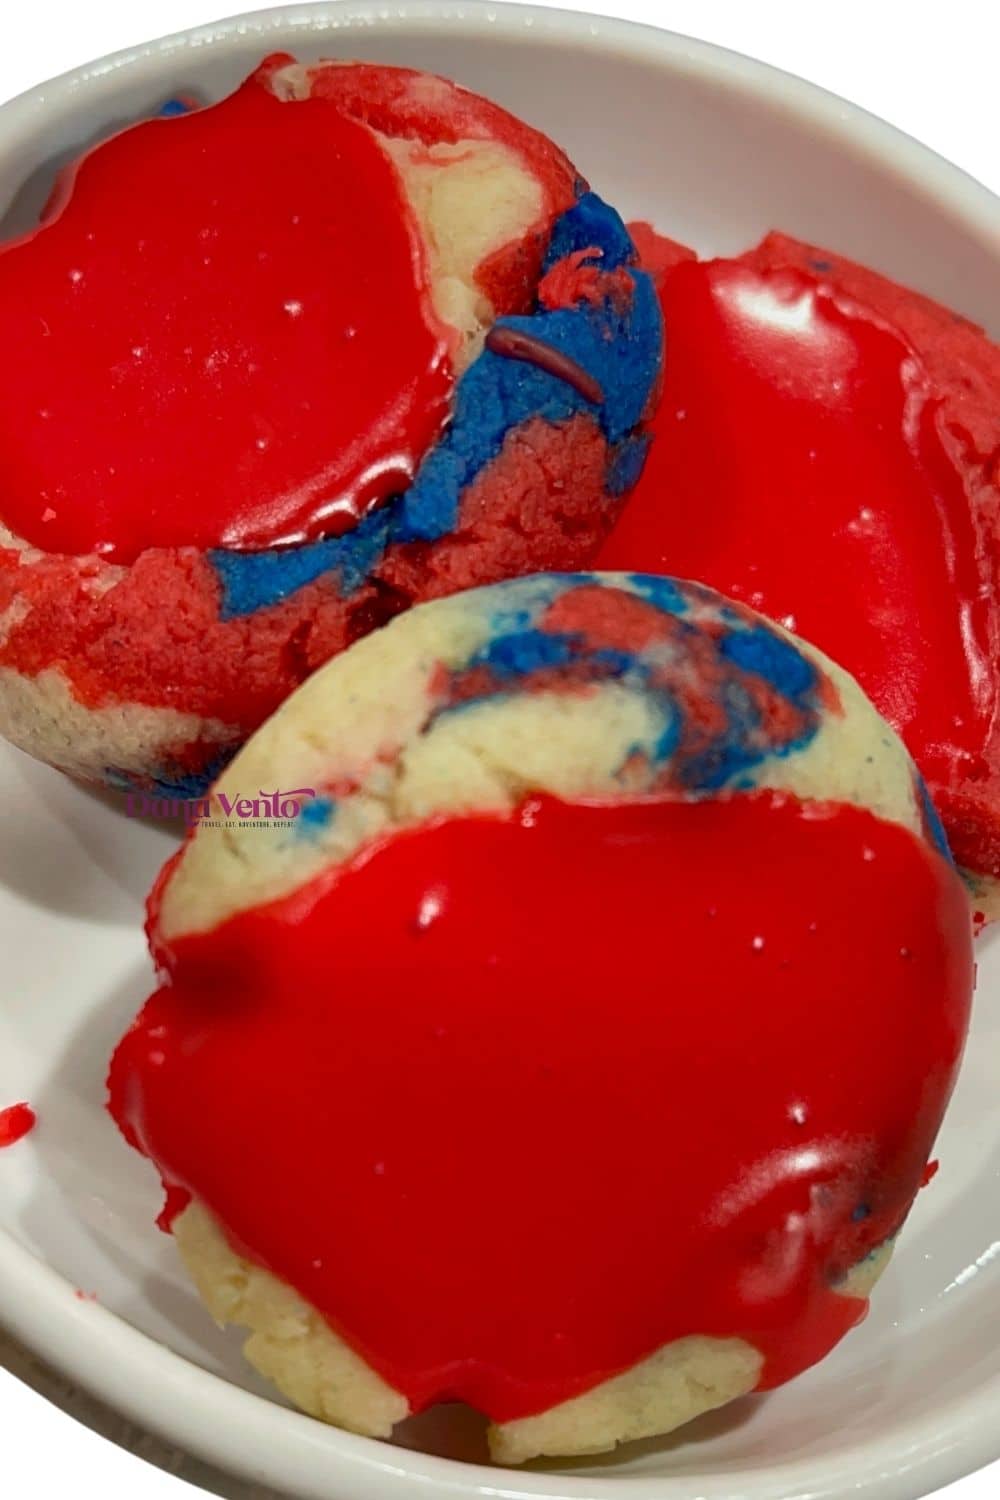
Here’s how you can create the perfect red or blue icing:
- Combine the confectioner’s sugar, vanilla, a teaspoon of water (or milk/cream), and a tablespoon of Karo Syrup in a medium-sized mixing bowl.
- Mix until well combined, ensuring the consistency is smooth.
- Adjust the thickness by gradually adding more confectioner’s sugar if needed.
- Once you’ve achieved the desired consistency, add food coloring to create the red or blue icing.
- Fill each cookie’s indentation with the icing and allow it to set for a few hours.
Tips for Perfectly Baked Thumbprint Cookies
Achieving perfectly baked thumbprint cookies is a delightful goal worth pursuing. To help you on your baking journey, here are some valuable tips to ensure your cookies turn out just right.
- Make sure your butter is softened but not melted to achieve the ideal cookie texture.
- Additionally, chilling the dough for at least 30 minutes before baking can prevent the cookies from spreading too much.
- When creating the thumbprint indentation, your thumb is your best friend, or you could use the back of a rounded measuring spoon, gently pressing without going too deep.
- To prevent the cookies from becoming overly dry, be mindful not to overbake them; they should have a slightly golden edge.
- Finally, allow the cookies to cool completely before adding the icing to ensure a beautiful and well-set presentation. Follow these tips, and you’ll be on your way to achieving perfect thumbprint cookies every time.
Popular Substitutions for Your Creative Twist
Feel free to experiment with these thumbprint cookies and add your creative twist. Here are some popular substitutions you can try:
- Instead of marbled dough, roll out patriotic dough balls in solid colors or create separate red, white, and blue balls.
- Use icing colors opposite the solid colors (i.e., a red cookie with white icing, etc.)
- Use blue icing instead of red for a unique twist.
- Try using multiple icing colors to make your cookies more visually appealing.
- Create cookies with a single color (red or white) and alternate between blue and white icing for a captivating design.
- Fill the cookies with white icing and add red and blue sprinkles to make them more colorful and festive.
Creative Decorating Ideas for Patriotic Cookies
- Elevate your patriotic thumbprint cookies with these creative decorating ideas. Be wild and free; design your cookies with a festive, eye-catching touch. Here are some ideas to inspire your cookie decoration:
- Edible Glitter: Sprinkle edible glitter over the icing to add a sparkling effect. It will make your cookies shine and capture attention.
- Festive Sprinkles: Decorate the cookies with red, white, and blue sprinkles, adding a POP of color and creating a fun and celebratory look.
- Drizzled White Chocolate: Melt white chocolate and drizzle it over the cookies. The white swirls on the colorful background will create an enticing visual contrast.
- Mini-American Flags: Insert mini-American flags into the cookies for a patriotic touch. It’s a simple yet effective way to emphasize the theme.
- Colored Sugar Crystals: Coat the icing with red, white, and blue sugar crystals. This will add texture and provide an extra burst of sweetness.
- Fresh Berry Garnish: Top each cookie with a fresh blueberry or raspberry to complement the red, white, and blue theme, adding flavor.
- Remember, decorating your patriotic thumbprint cookies is an opportunity to let your creativity shine. Feel free to mix and match these ideas or create your unique decorations. Have fun and create cookies that are not only delicious but visually stunning as well!
How to Store the Summer Patriotic Red White Blue Thumbprint Cookies
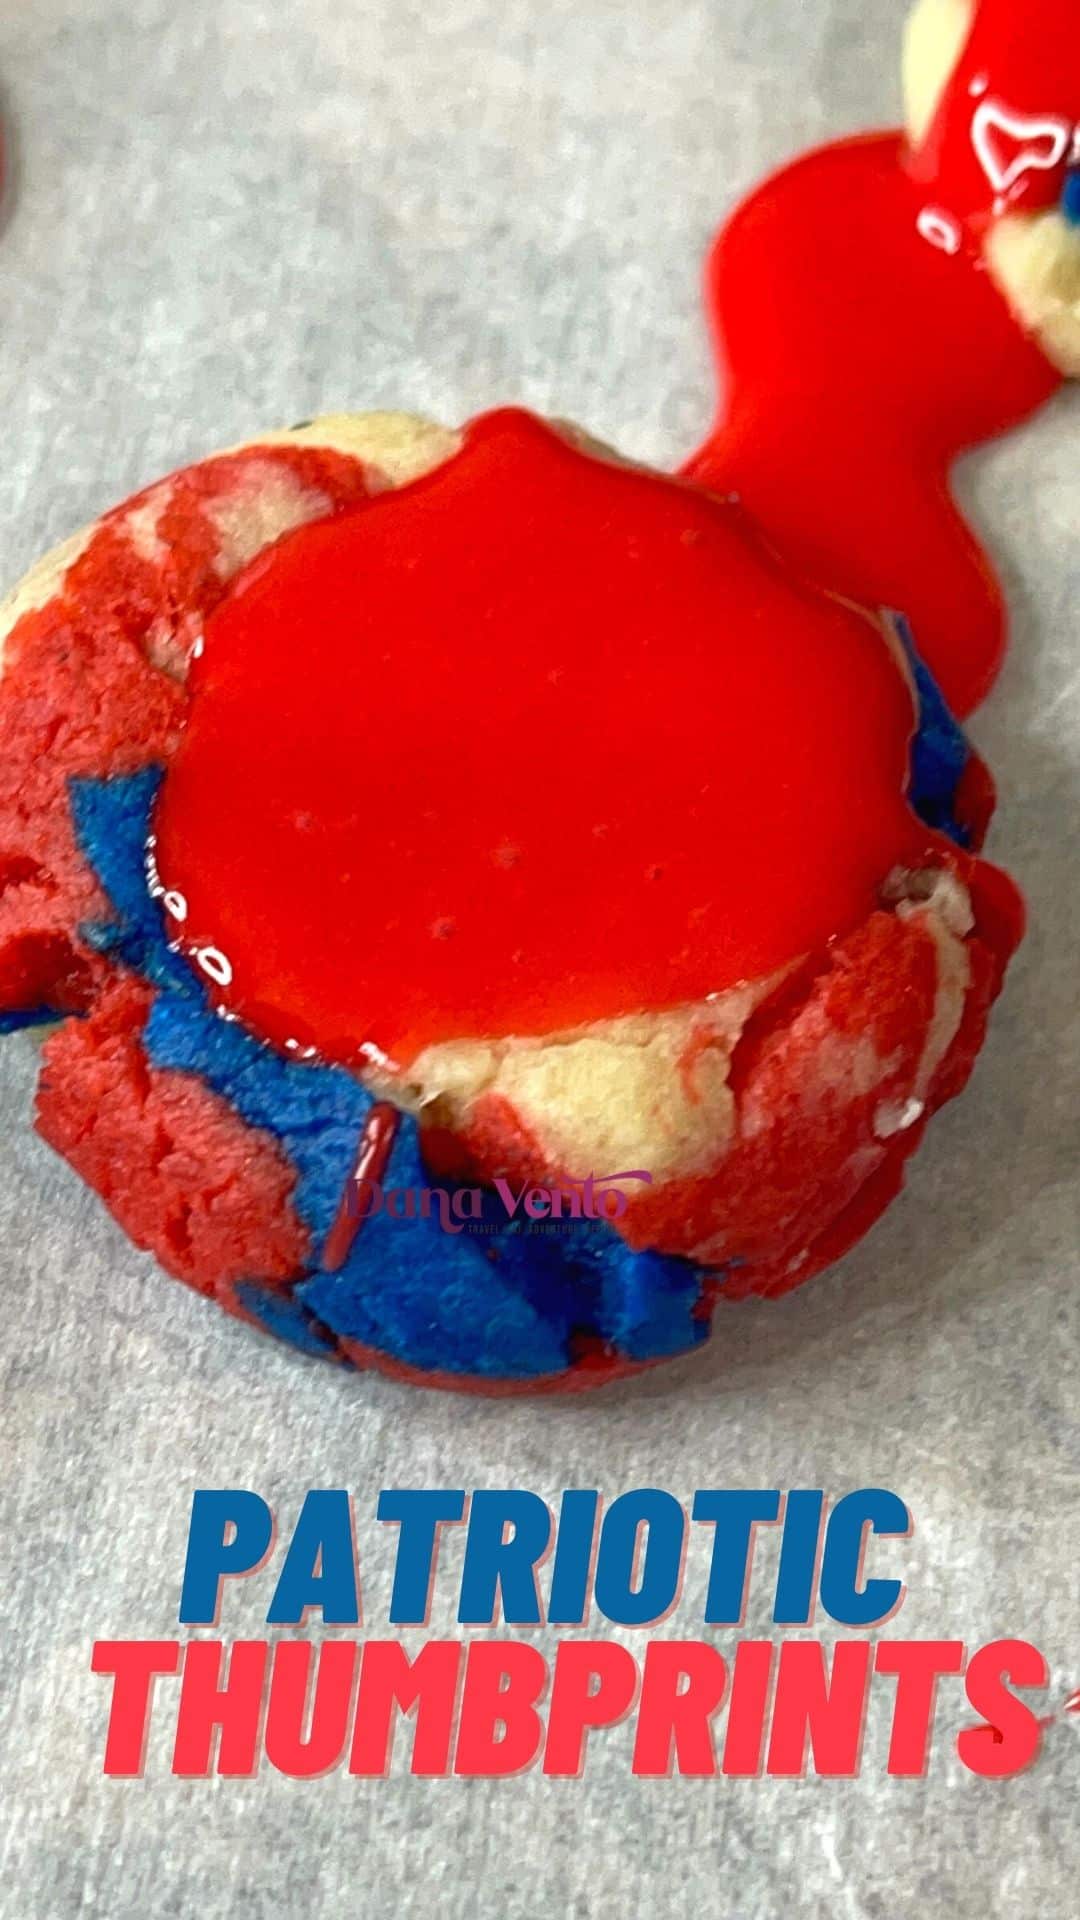
Store your cookies in an airtight container to keep them fresh and delicious.
Keep them at room temperature for a few days. If you need to store them longer, you can freeze them for up to 6 months.
PRO TIP: Bake This And Every Summer Dessert Recipe With Ease
I use my favorite bakeware, which has changed my cookie baking from the day I started using it! No burned cookies, and ALL My cookies (yes, an ALL statement) have been evenly cooked! GET 25% OFF TOO! Use code: INTHEKITCHENWITHDANA
Red White Blue Thumbprint Cookies Recipe FAQs
1. Can I freeze the Summer Thumbprint Batter before baking?
Yes, you can freeze the cookie dough for up to 6 months. Store it in a freezer-safe plastic bag and thaw it when ready to bake.
2. Do I have to add the berry blue flavoring to the patriotic thumbprint cookies?
No, the berry blue flavoring is optional. The cookies taste delicious, with or without it. If you prefer a classic vanilla flavor, you can skip this ingredient.
Other A New and Different Summer Dessert Recipe From Our Collection
If you’re looking for more delightful dessert recipes, here are some recommendations:
Don’t Forget to Share Your Summer Patriotic Red White Blue Thumbprint Cookie Experience
Once you’ve baked these delicious cookies, remember to return and share your experience! We would love to hear how your Summer Patriotic Red White Blue Thumbprints turned out. Enjoy this delightful treat and celebrate the joy of summer with every bite.
Grab the recipe for these colorful Summer Patriotic Holiday Thumbprint Cookies Let your baking adventure begin!
Here’s What Our Readers Are Saying About Our Patriotic Red White Blue Thumbprint Cookies
- Pam J from Texas says, “These patriotic thumbprint cookies were a hit at our Fourth of July party! The burst of flavors from the berry blue gelatin and colorful icing made them a standout treat. The recipe was easy to follow, and the cookies turned out perfectly. Thank you for adding a festive touch to our celebration!”
- Caroline from New Jersey says, “I can’t get enough of these delightful thumbprint cookies! The combination of red, white, and blue colors made them look so festive. They were a breeze to make, and the taste was amazing. I’ve received so many compliments from my family and friends. I’ll definitely be making these again next year!”
- Katie from California says, “These patriotic thumbprint cookies were a big hit at our summer picnic. The recipe was simple to follow, and the cookies turned out beautifully. The kids especially loved the vibrant colors and sweet icing. Thank you for sharing this recipe—it has become a new favorite in our household!”
- Chloe from PA says, “I’m so grateful for this incredible thumbprint cookie recipe! The flavors of the berry blue gelatin and the soft, buttery cookies were a match made in heaven. They looked stunning on the dessert table and disappeared within minutes. These cookies will be a staple at all our future holiday gatherings!”
- Ellie from Alabama says, “Wow, these patriotic thumbprint cookies were a sensation at our Labor Day BBQ! The combination of flavors and the eye-catching colors made them the star of the dessert spread. They were incredibly delicious and had the perfect texture. Thank you for sharing this recipe—I received numerous requests for it!”
RECIPE For Patriotic Red White Blue Thumbprint Cookies ↓↓↓
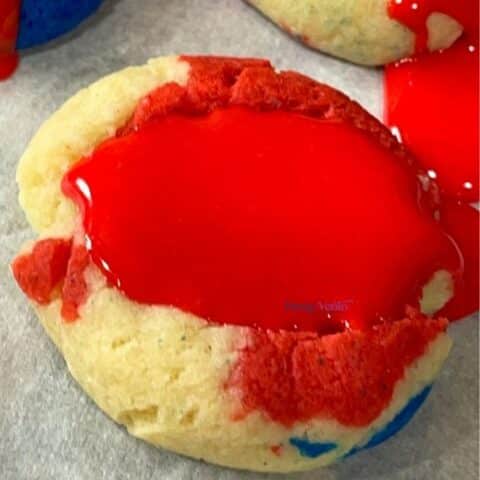
Summer Patriotic Red White Blue Thumbprint Cookies
Summer patriotic red white blue thumbprints are vividly colorful, easy-to-make cookies with a depressed inlay begging to be filled with colorful patriotic icing, and the berry blue flavor bolsters the simple-to-follow recipe crafted from a base of cake mix, creating a no-fail holiday cookie recipe that can be served for any summer picnic, BBQ, celebration, or Memorial Day, Fourth of July, and Labor Day!
Ingredients
- 1 Box White Cake Mix
- 2 Eggs
- 1 Stick of Softened Butter
- 1 C Flour
- Red And Blue Food coloring
- FOR THE RED OR BLUE ICING
- 2 C Confectioner's Sugar
- 1 Tsp Vanilla
- 1 Tbsp of Water (Milk or cream)
- 1 Tbsp of Karo Syrup (for the beautiful sheen)
- red food coloring
- blue food coloring
Instructions
- Preheat the oven to 350°F
- Line 3 baking trays with parchment paper and set aside.
- In a large mixing bowl, combine the softened butter and the eggs.
- Add in the flour and mix to combine.
- If you are adding in the berry blue gelatin for flavor do it now otherwise skip to step 6.
- Once combined, divide the dough into 3 separate portions, leaving one portion in the bowl to add food coloring too.
- Add red coloring to this portion, mix just enough to get the color you want, and then stop, and remove it to a holding bowl.
- Add in the next portion of dough (after cleaning out the mixing bowl so the red color (if any is remaining does not mix into the Blue).
- Place blue food coloring on the dough portion and repeat the mixing as above in step 4.
- Once mixed leave it in the bowl.
- Add in the other colors, then roll into a large bowl.
- Then you will use that ball of dough to form teaspoon-sized portions and roll each into balls.
- Place on a parchment-lined baking tray.
- After you've filled the tray with the patriotic dough balls you will indent each without pressing through the ball.
- Place the tray of summer patriotic red white blue thumbprints into the oven to bake for 8 minutes.
- Keep an eye on the cookies as you will have a slightly more difficult time knowing if they are browning on the bottom and you don't want that!
- Once baked, remove from the oven and allow to cool on the tray for about 5 minutes, letting the cookies set a bit.
- Then transfer to a cooling rack.
- Allow the cookies to rest for about 40 minutes before filling with red or blue icing.
- TO MAKE THE ICING
- In a medium-sized mixing bowl, place your confectioner's sugar, vanilla, and teaspoon in a teaspoon of water (or milk or cream) and the Karo Syrup.
- Mix to combine and make sure it's not runny.
- If it is runny you will need to add more confectioner's sugar, tablespoon by tablespoon.
- However, if the consistency is just right (which it should be) you can add in the food coloring of choice until your desired color is achieved.
- Fill Each cookie with the icing.
- Allow each cookie to set up and the icing to dry (a few hours)
- Then seal in an airtight container until you are ready to serve them.
Notes
For the icing, you can either use a long ice-tea spoon to deliver the icing per cookie or you can transfer the icing into a plastic bag (use a cup to support the bag when pouring the icing), or a plastic disposable sleeve to pipe the icing into each indented cookie.
If you want you can add sprinkles to the icing.
We love these refrigerated on a hot holiday weekend!
Nutrition Information:
Yield: 36 Serving Size: 1Amount Per Serving: Calories: 78Total Fat: 3gSaturated Fat: 2gTrans Fat: 0gUnsaturated Fat: 1gCholesterol: 17mgSodium: 34mgCarbohydrates: 11gFiber: 0gSugar: 8gProtein: 1g
You may yield more or less depending how big or small you create your cookies.



Leave a Reply