Ah, the under-sink space, the Bermuda Triangle of your home. Things go in, but they never seem to come out, right? But what if I told you there’s a way to turn this chaotic abyss into a well-organized storage haven?
Say hello to the under sink dowel rod hanger: DIY Edition. This project will declutter your space and add a dash of sanity right back into your life! Chaos is no one’s friend, but organization is!
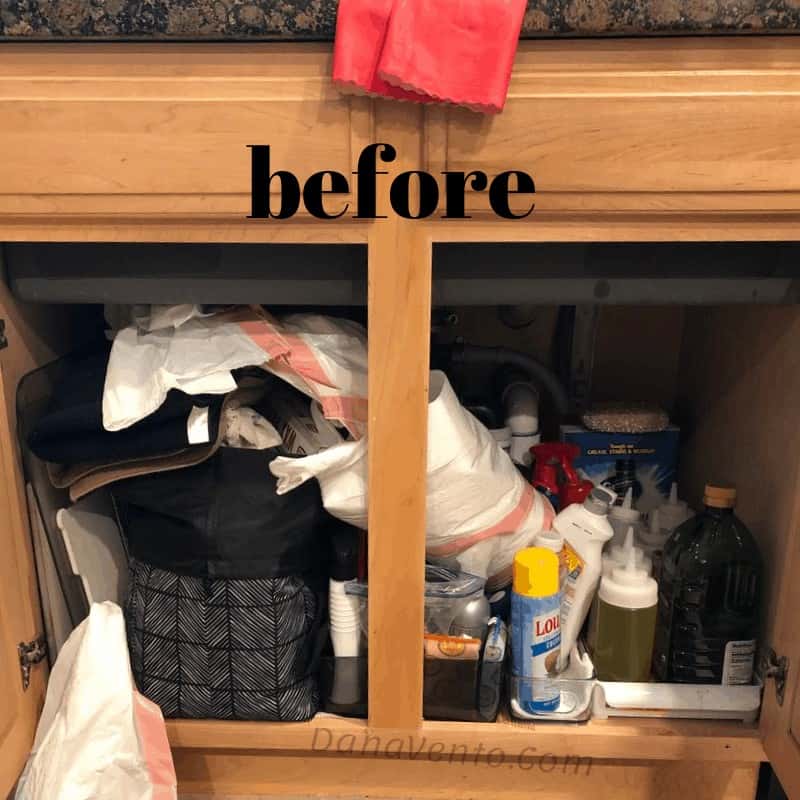
You know you need this project. Why? Because every time you venture under the sink, it’s like embarking on a scavenger hunt from hell.
You’re not just searching for that elusive bottle of cleaner. Oh no, you’re discovering other “treasures” that derail you completely. Sound familiar? That’s me, the queen of starting multiple projects at once, thanks to my ADHD.
But here’s the kicker: cleaning up this mess means you’ll find what you need when you need it fast.
No more getting sidetracked and as an added bonus your sturdy hanging rack project cleanout will help you find duplicates and triplicates of items you keep buying but don’t need — it will save you money!
This DIY isn’t just for your kitchen sink. It’s versatile enough for any room. So stick around, and let’s turn that under-sink chaos into something beautiful and functional.
So keep reading; I’ll show you how to quickly wrangle your mess and move on to the next project!
Table of Contents
Benefits of an Under Sink Dowel Rod Hanger
At its core, this project is about organization. But it’s also incredibly functional. You can air dry gloves, hang spray bottles, and keep everything within easy reach.
Plus, because it’s customizable, you can tweak my DIY recipe any way you need to help your organizational under-sink area.
- Sturdiness: Unlike tension rods, a dowel rod hanger is designed to stay put. No more “sitting and sliding” here!
- Ease of Installation: It’s fast, easy, and won’t untwist and break on you.
- Material: The rod is wood, not flimsy aluminum, making it a durable choice.
- Adjustability: No twisting to open and adjust; it stays where you put it.
- Customization: You can cut the dowel to any size, and they come in various thicknesses to suit your needs.
- Cost-Effective: The project is inexpensive, saving you money for other things.
- Time-Saving: It takes little time to install, freeing up your time for other projects.
- Visibility: You’ll finally see the bottom of your sink and find what you need when needed. Isn’t that the whole point?
Make an Under Sink Dowel Rod Hanger to Tame Chaos
Impactful change is all about making a difference quickly and easily. With my easy-to-follow guide on crafting an under-sink dowel rod hanger, you’ll gain organization and change the mess in any room.
If you’re constantly rummaging through a disorganized mess under your sink cabinet, it’s high time for a change. Why waste time sifting through clutter when you can tame the chaos?
Why a Sturdy Hanging Rack Beats a Tension Rod
Look, I get it. Many “experts” out there tell you to just slap up a tension rod and call it a day. But let’s cut the crap. If you follow the directions of someone telling you to install a simple tension rod, you’re setting yourself up for disaster. Trust me, I’ve been there and done that, and I can tell you this: “Epic fail ahead!”
Why? Because those tension rods are not built to withstand the weight of your cleaning supplies. The middle is the weakest point, and it’s gonna sag, slide, and separate faster than you can say, “Oops.”
Most tension rods must be bigger than what can fit under your sink to give it the strength it needs. But if you can’t fit it, you can’t cut it or use it.
Plus, no matter how tight you get a tension rod, if it’s too thin, it will slide with weight before it even snaps. So, if you’re considering going the tension rod route, let me save you the headache.
Materials You’ll Need for Your Under Sink Dowel Rod Hanger
Before diving into this project, let’s ensure you’ve got all your ducks in a row. I won’t give away all the details here; for the complete list, you’ll want to check out the DIY card at the end of this post.
But here’s a quick rundown to get you started:
- Cleaning Mixture: My around-the-house brew is a two-ingredient wonder that cleans almost every surface. (Check out my post for the recipe!)
- Rags: You’ll need these to apply the cleaning mixture and scrub-a-dub-dub.
- Rubbing Alcohol: For prepping the surface before applying adhesive strips.
Remember, you’ll want to start with a good cleaning. We’re ushering in a new, clean era under your sink, so use my simple two-ingredient cleaning solution to scrub away the grime before you even think about installing anything.
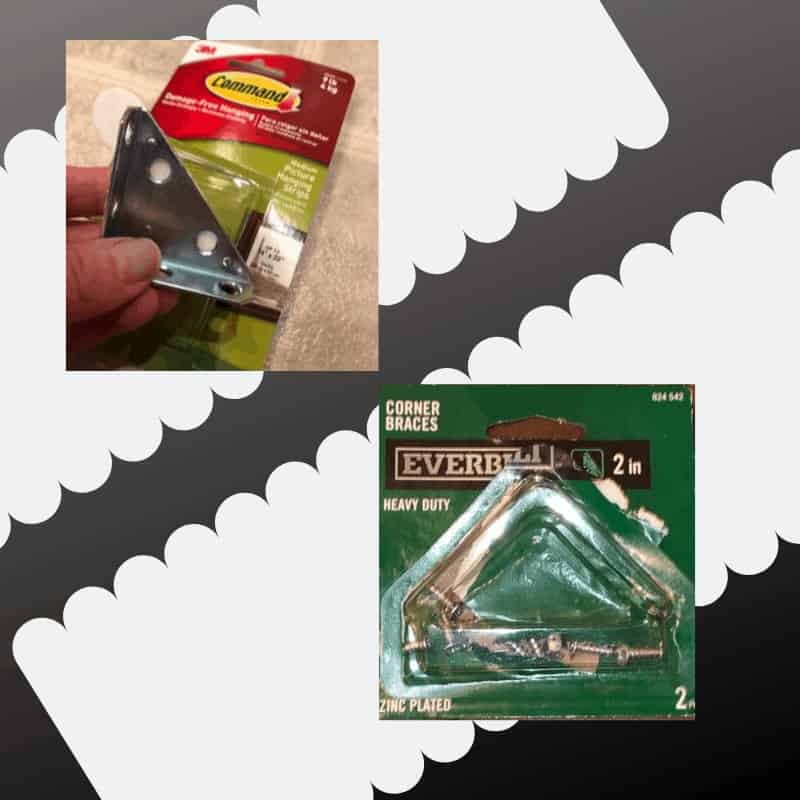
- Dowel Rod: Choose one that fits your needs. We’ll talk more about this later.
- Wall Brackets: These bad boys will securely hold your dowel rod.
- Adhesive Strips: For those of us who’d rather not drill holes in our cabinets.
- Measuring Tape: Because size does matter, at least when it comes to DIY projects.
Remember, these are just the essentials. You’ll find a more comprehensive list in the DIY card below, so make sure to check that out.
How To Build Your Under Sink Dowel Rod Hanger
Now that we’ve got our materials sorted let’s dive into the nitty-gritty details of this DIY project. Trust me, you’ll want to pay attention here; the devil’s in the details, as they say.
Choosing the Right Dowel Rod For A Sturdy Hanging Rack
Choosing the right dowel rod is like choosing the right life partner; it’s got to be strong, reliable, and the perfect fit for you. Dowel rods come in various shapes and sizes, from round to square, and their diameters vary widely.
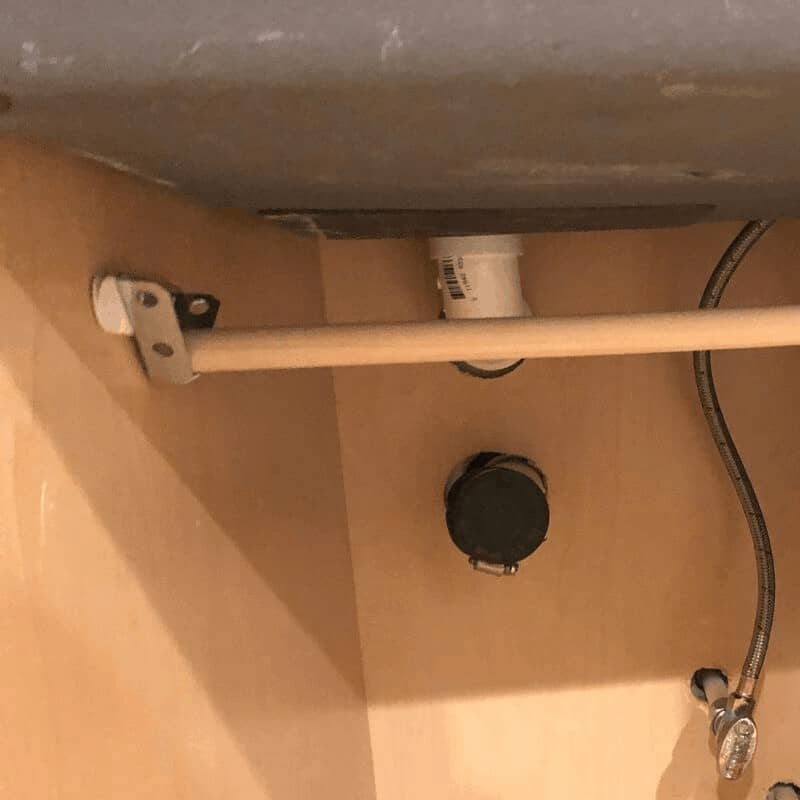
Here’s the deal: if you go too thin, you risk the dowel rod snapping like a twig under the weight of your cleaning supplies. Too thick, and it might not sit well in your chosen brackets, or it could be too heavy for adhesive strips if you’re not drilling.
So, how do you find the Goldilocks zone of dowel rods? Consider the weight of the items you’ll be hanging. Lighter things like cleaning gloves or hanging scrub brushes can get by with a thinner dowel, while heavier items like full-sized cleaners may require a thicker, sturdier rod.
Remember, the dowel rod is the backbone of this DIY project. Choose wisely, and you’ll have a sturdy hanging rack that’ll last for years. Skimp on this step, and you’ll be back to square one before you can say “under-sink chaos.”
Choosing the Right Hangers for Your Under-Sink Storage
Before you go all in with power tools, let’s talk about alternatives. I chose angled brackets and Command strips for a reason. They’re sturdy, easy to install, and, best of all, they don’t require drilling.
Why is that important? Because my under-sink cabinet is right next to my dishwasher. Drilling into that area could lead to a whole host of problems, and I’m not about to take that risk.
Plus, who knows? A better solution might come along, and I want the freedom to switch things up. It’s been five years, and this setup is still rock solid. Or if you live in an apartment nothing can be permanent right?
A Lesson in Ignoring Unsolicited “Expert” Advice
Here’s a little tale for you. I was at a home improvement store, and an employee—let’s keep it gender-neutral—decided to share their “expert” opinion. They insisted that my idea wouldn’t hold up and that I should use power tools to drill the brackets in.
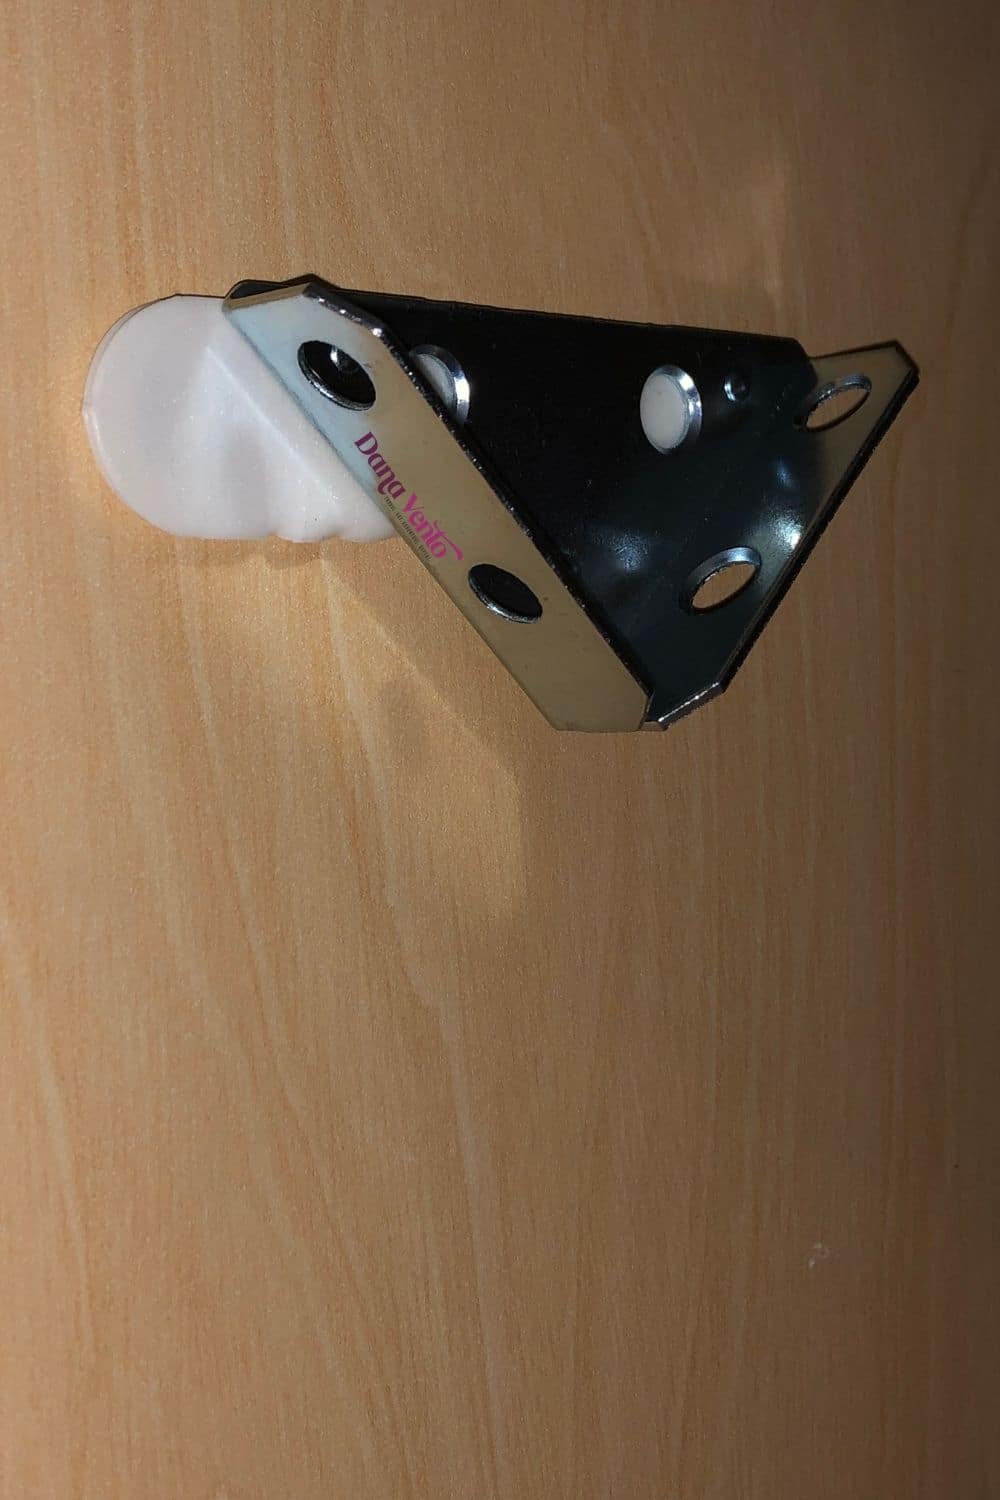
Spoiler Alert: Five years later, my under-sink dowel rod hanger is still as sturdy as day one. No thanks to that so-called expert.
The employee was so eager to share their wisdom that they didn’t even consider my specific needs. My under-sink cabinet is right next to my dishwasher.
Drilling there? Not an option. And their disdain for 3M Command strips? Clearly, they needed to be thinking it through.
So, what’s the takeaway? Trust your instincts, and don’t let anyone derail your plans, especially when you’ve got a solid strategy like this one.
Safety First: Precautions for Your Under Sink Dowel Rod Hanger
Before we get our hands dirty, let’s cover a few safety basics that are actually relevant to this project. No fluff, I promise.
Essential Safety Tips For Installation
- Protective Glasses: When cutting that dowel rod, ensure you’re wearing protective glasses. Wood chips have no business being in your eyes.
- Rubbing alcohol: Keep it sealed and out of reach, especially if you have curious pets. This stuff can be harmful if ingested.
- Mind the Wires and Hoses: Be aware of any electrical wires from your garbage disposal or water lines from your dishwasher. The last thing you want is to accidentally cut or damage something crucial.
Step-by-Step Guide to Building Your Sturdy Hanging Rack
Before diving into the nitty-gritty, let’s get straight: this isn’t rocket science. You don’t need a Ph.D. in Engineering or Carpentry to pull this off. A little time, some basic materials, and a dash of DIY spirit.
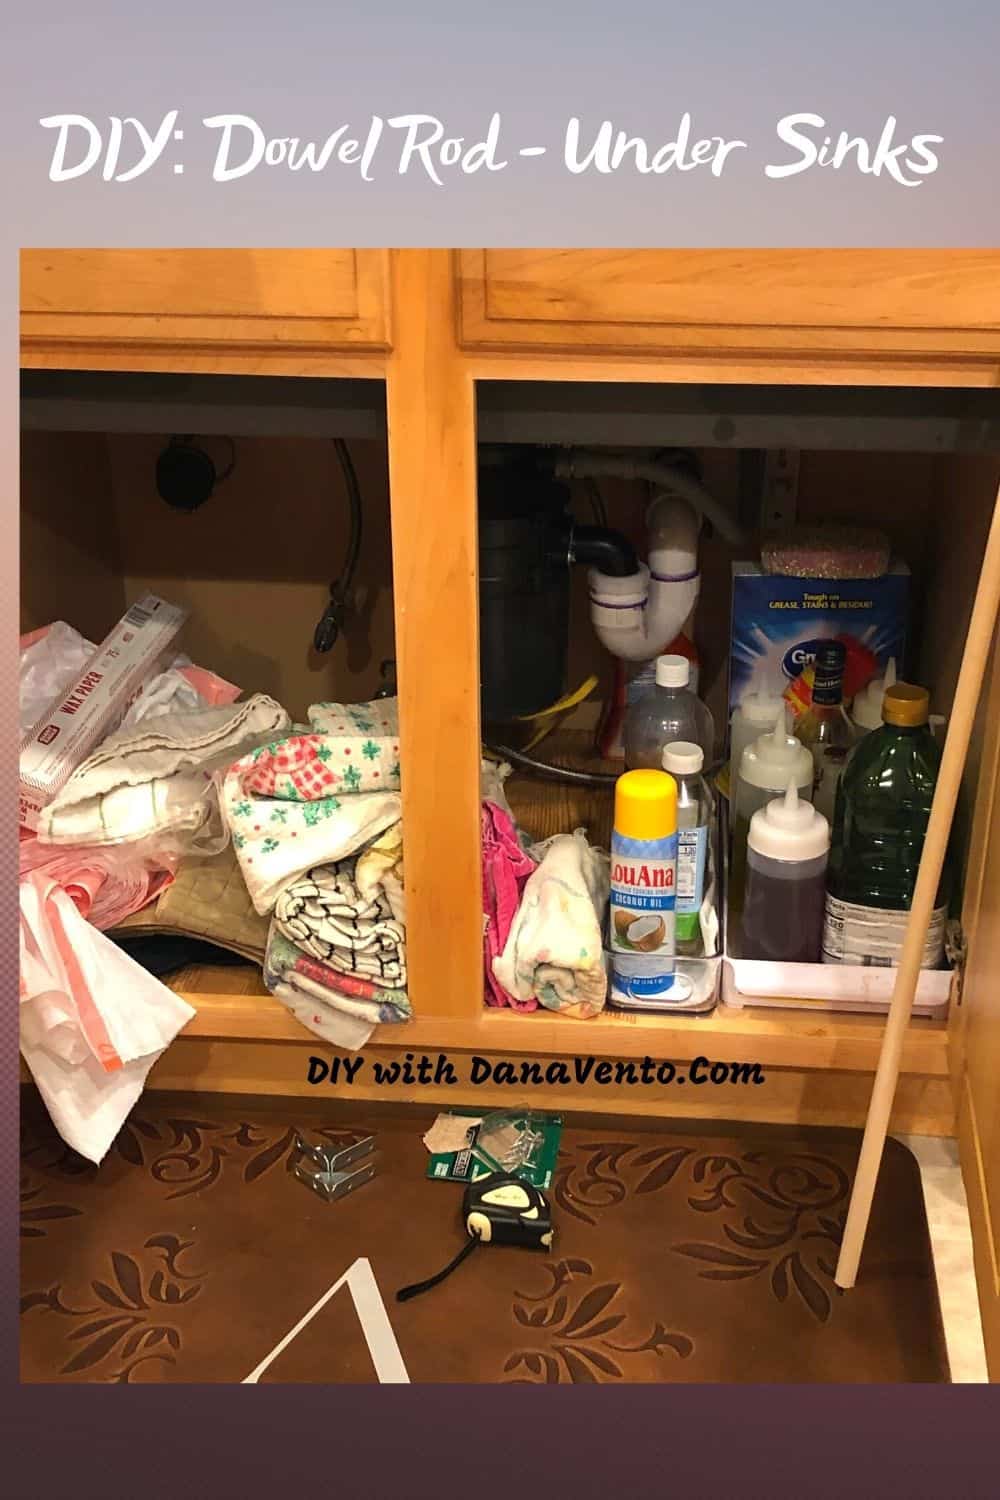
Measuring Your Space For Your Under Sink Dowel Rod Hanger
- First things first, grab that tape measure and get the dimensions of your under-sink area.
- Measure the width between the two walls where you’ll mount the dowel rod.
- Make sure to leave some room for the brackets.
Cutting the Dowel Rod For Your Sturdy Hanging Rack
- Head outside with your dowel rod and a saw.
- Make sure you’re wearing protective glasses.
- Cut the dowel rod according to the measurements you took.
Securing the Hangers For Your Sturdy Hanging Rack
- You’ll want brackets that can securely hold the dowel rod and allow easy removal if you decide to switch things up.
- We’re using 3M Command Strips because they’re sturdy and don’t require a lifelong commitment to your under-sink cabinet.
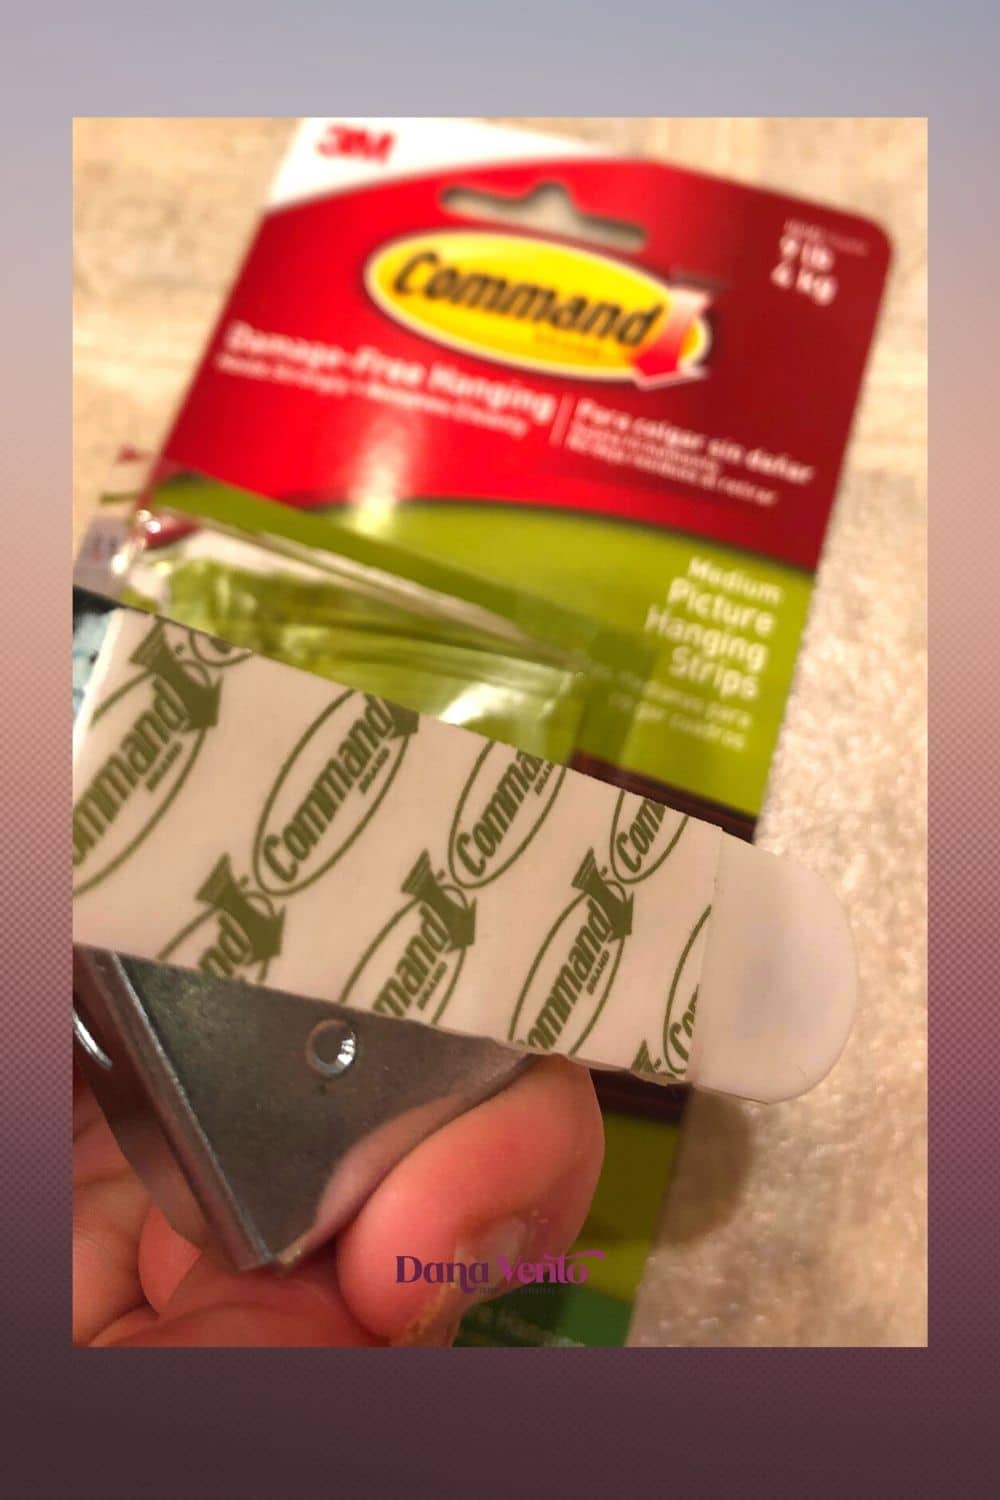
Installation Tips For Your Sturdy Hanging Rack
- Make sure the area where you’ll place the brackets is clean. Use my simple 2-ingredient cleaning solution to scrub-a-dub-dub.
- Be mindful of any wires or hoses. The last thing you want is to cut your dishwasher’s lifeline accidentally.
- Have your rubbing alcohol ready, but make sure the bottle is closed to prevent spills, especially if pets are around.
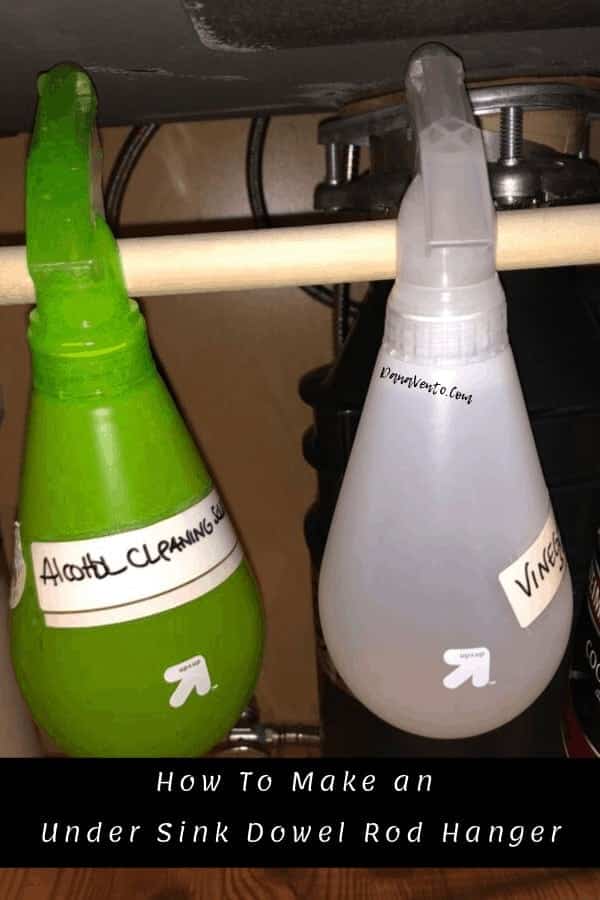
Spray Bottles To Use Under Your SInk On Hanging Rack
- I’ve shared a lot about hanging spray bottles on this rod, and here are the spray bottles I use (you can find them at Target, too, or something similar, but my experience with Target bottles is that a lot of them fail to work after a while whereas these seem not to break as often).
- I fill my top needed cleaning solutions, which I call a day.
- I also use waterproof labels and ALWAYS turn the spray bottle off!
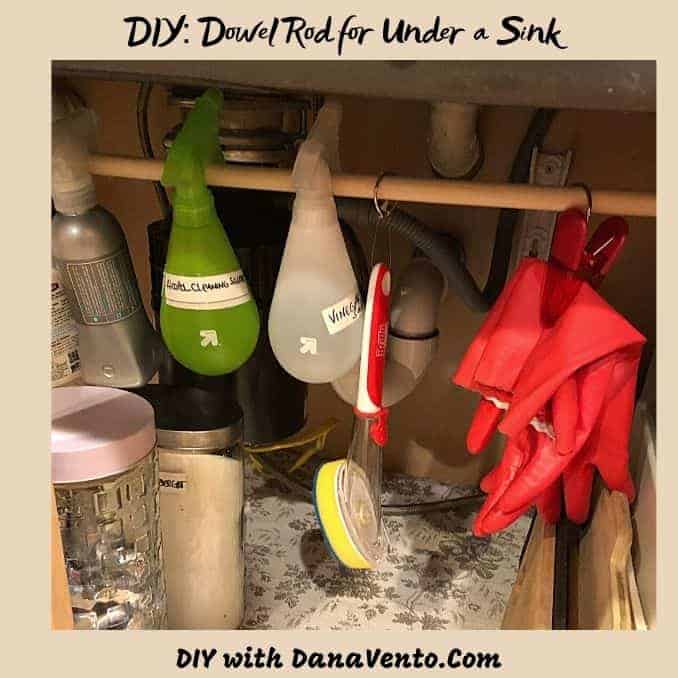
Maximizing Storage Space Using A Sturdy Hanging Rack
- Now that your sturdy hanging rack is up, think about what you will hang.
- Cleaning supplies are a given, but what about small baskets for sponges or a holder for dish gloves?
- Take a trip to the “dollar” store and find what is thin enough to help yet big enough to hold and grab some command hooks, and WOW: GO, you DIYer, you are acing this organization under the sink!
Pro Tip
- Remember to clean the panels on your doors and use that space for some cleaning baskets or hooks.
- You have the room now because everything is not jammed against the under-sink cabinet doors. “WOOHOO”
FAQs For Your Under-Sink Sturdy Hanging Rack
Do I need to drill holes for this project?
No, you don’t have to drill holes. The 3M Command Strips are sturdy enough to hold the brackets in place.
Is this project expensive?
No, it’s quite budget-friendly. Most of the materials can be found at your local hardware store or even in your home.
Can I customize the dowel rod?
Yes, you can paint it, add hooks, or even use a thicker or thinner rod depending on your needs.
Is this DIY Under Sink Hanging Rack time-consuming?
No, it takes about 30 minutes to an hour, depending on your level of DIY expertise.
Is this project suitable for renters?
Yes, it’s perfect for renters because it doesn’t require drilling holes into the cabinets.
Keep Your Under-Sink Dowel Rod Hanger Fresh and Functional
Keeping your new setup clean is straightforward. Periodically check for any clutter that might have accumulated. If you find that you’re not using certain items, consider moving them to a different storage area.
Seasonal refreshes are recommended to keep this area accessible and organized, just like when you first set it up.
If you notice the dowel rod is sticky or grimy, simply remove it and wipe it down with a damp cloth. For a deeper clean, you can use my two-ingredient cleaning solution.
The brackets themselves shouldn’t need much maintenance unless the adhesive strips come undone. In that case, replace the strips and reattach the brackets.
Common Mistakes to Avoid with Your Sturdy Hanging Rack
- Not measuring your space accurately.
- Cutting the dowel rod too short or too long.
- Not considering the weight limitations of your brackets.
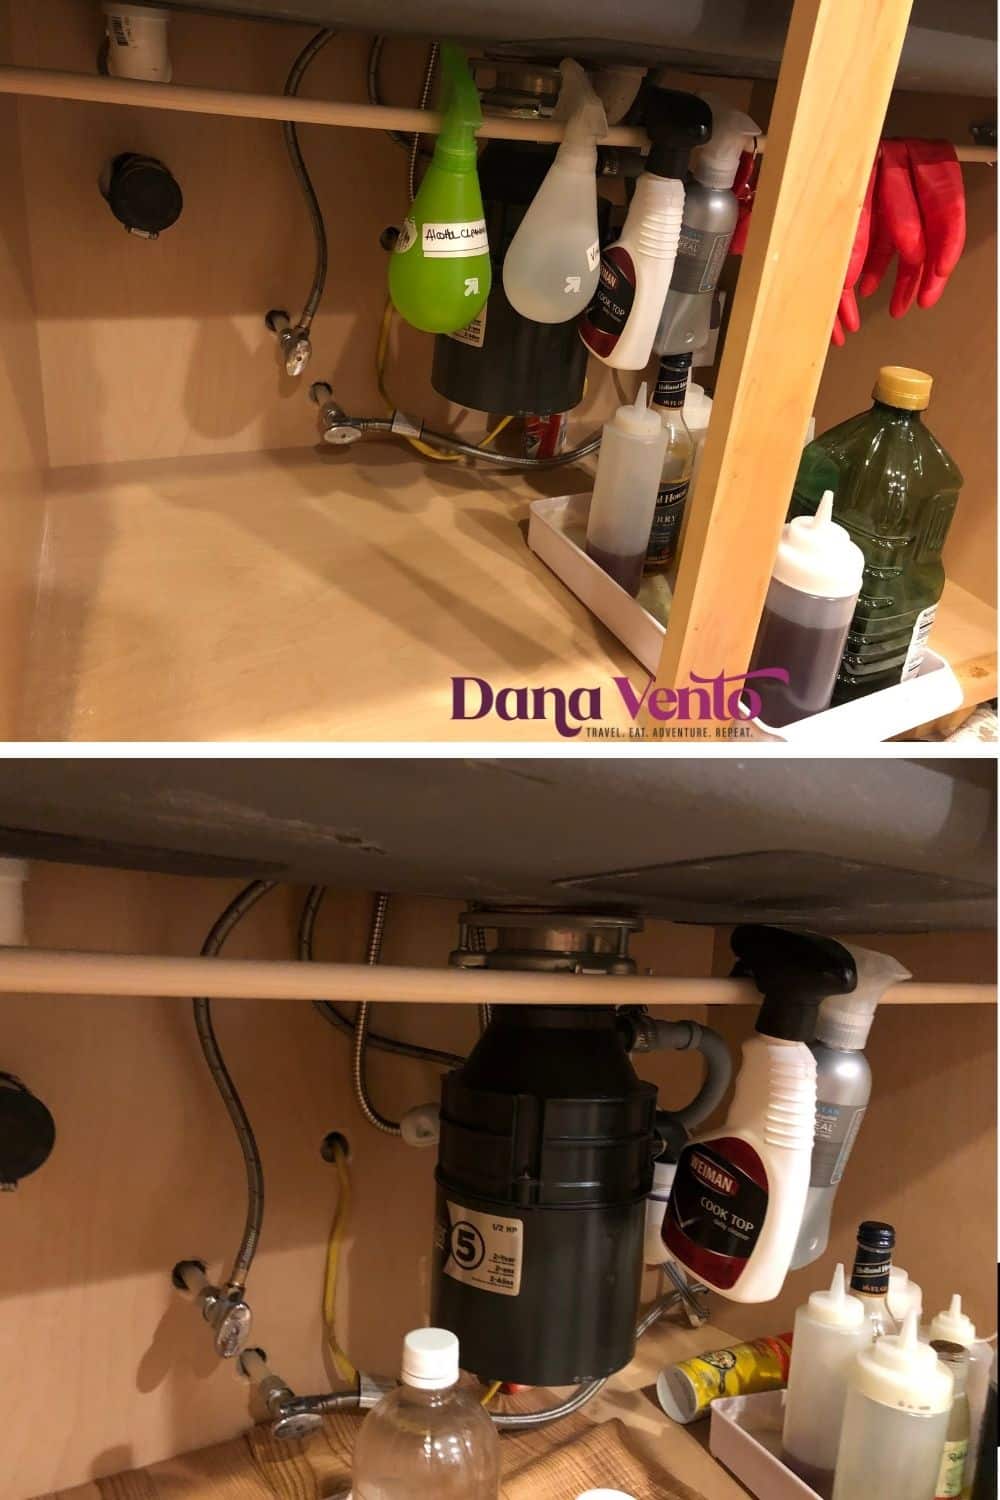
Remember, this setup won’t take the weight of tons of bottles. Consider what you need and use, pare it down during your cleanout, and lessen the options. I find that my cleaning solution takes care of everything, and if I need bleach or other things, I go to my other locked cabinet (kids and cleaning solutions don’t mix).
Budget and Time To Make Your Under Sink Dowel Rod Hanger
This project is budget-friendly. Most materials can be found around the house or purchased for a few bucks at your local hardware store.
As for time, the initial cleaning phase could vary. Once you start measuring to hanging, expect to spend a few hours. This includes a trip to the store, decluttering your space, and letting the adhesive strips set.
Reclaim Your Space With a Sturdy Under-Sink Hanging Rack
Now it’s your turn to create an under-sink dowel rod hanger that’s not only functional but also stylish and customizable.
You’ve just turned your under-sink chaos into organized bliss. And the best part? It didn’t cost an arm and a leg, and you didn’t have to sacrifice your weekend to get it done.
Are You Ready to Tackle Your Under-Sink Chaos?
If you found this guide helpful, why not share it with your friends and family? Trust me; they’ll thank you for it. And don’t forget to share your own under-sink transformations. Let’s keep this DIY community thriving! Let me know how yours turns out! ~ DANA XO
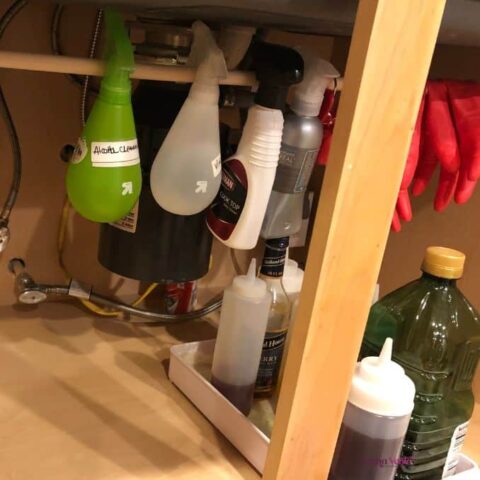
Under Sink Dowel Rod Hanger
Conquer the clutter under your sink with this quick and easy DIY dowel rod hanger. In just a few steps, turn your chaotic storage space into an organized haven. Perfect for spray bottles, cleaning supplies, and more!
Materials
- Rubbing alcohol
- Cleaner and a rag
- 3m velcro picture hanging strips - 12-pound holders (2 strips = 8 pounds)
- 'V' Brackets/Corner Braces (not using the screws unless you want it mounted forever)
- Dowel Rod 3/4" Wide
- Saw or snips
- Tape Measure
- Pencil
Tools
- Saw
- Safety Goggles
- Tape Measure
Instructions
- Measure for dowel length: Before you even head to the store, measure the length you'll need for your dowel rod.
- Decide on bracket placement: Once you have your dowel, figure out where you want your brackets to go under the sink. Ensure your height allows your spray bottle nozzles to fit on the rod without scraping against the sink bowl.
- Mark both sides: Use a pencil to mark both sides of the under-sink walls to ensure your brackets will be level; you don't want any uphill or downhill slopes.
- Clean the wall: Before you affix any Command strips, clean the area where they'll go with rubbing alcohol.
- Wait for it to dry: Allow at least 10 minutes for the alcohol to dry thoroughly.
- Place Command strips: Attach one side of each Command strip where you've marked for the brackets.
- Attach strips to brackets: Stick the other side of each Command strip to the corresponding bracket and set them aside.
- Wait for adherence: Let the Command strips sit for at least an hour to ensure they adhere properly to the wall.
- Measure between brackets: Now that your brackets are in place, measure the distance between them to know exactly how long to cut your dowel rod.
- Cut the dowel: Use a saw to cut your dowel rod as precise as possible according to this new measurement.
- Sand if needed: If your dowel is off by just a hair, a little sanding can make it fit perfectly; there's no need to recut unless you're really good with that saw.
- Insert the dowel: To insert the dowel into the brackets, tilt it slightly; it's not a straight drop-in.
- Stock it up: Finally, go ahead and hang your cleaning supplies on your new under-sink dowel rod hanger.
- Admire your work: Take a step back and admire your newly organized space.

