 You already know I love Christmas and I go all out decorating.
I am about to share with you a DIY Tabletop Christmas Tree in a Bucket that is Under $5 to create.
In fact, it’s even less than $5 because you can use ‘other’ items in your home and may not need to buy much at all!
Coincidentally, this project is a tad eco-friendly as it upcycles and recycles, while also using a few store-bought items.
When you make this DIY Tabletop Christmas Tree in a bucket, consider making multiple.
Why?
Because a set of three looks 3x as nice and gifting a tabletop Christmas tree in a bucket is chic.
Also, these are great hostess gifts and they definitely bring the holiday spirit with you.
Get ready because the secret store where you will be heading is not so secret. The lines are always huge and the products vary.
What you don’t ever have to worry about is anything being over $1 and some change.
You will need about 5 minutes to create this project from start to finish and it will last for years.
Cheers to the holidays, and let’s get started making this easy to create tabletop tree so you can begin enjoying it.
DIY Tabletop Christmas Tree in A Bucket Under $5

I’ve been eying up a lot of these galvanized Christmas trees in a bucket.
A few years back, we had a small live one, but, I have to be honest, I did not want to care for it year-round.
In fact, I believe the beauty of the season is in enjoying the decor then and packing it away for the following year.
It’s not as special if you have that decor up all year round, and it seems to take away from the season.
Because I can’t get galvanized and Christmas Tree out of my mind when I see them together, I don’t want real.
Your opinion might vary, then, of course, this project is not for you.
Try out my Shabby Chic Tabletop Tree with this Tutorial.
We are Headed TO The Dollar Tree to Gather Our Products for a DIY Tabletop Christmas Tree
Generally, I stick to the front of the Dollar Tree to get what I need and get out. Those lines build fast and I don’t want to be in them.
Seasonal is upfront, but they’ve gotten better at really hiding stuff in the back of the store.
Traditionally, I could walk in, gather my stuff at the SEASONAL section, and be gone.
However NOW, I have to traverse through ALL the aisles because seasonal is on end caps, by the freezers, in the middle, it’s everywhere.
Mind you, this has all paid off rather well, as I have gotten to be more acquainted with the store.
Now, my mind sails when I begin to think of great DIY projects and alternate stores.
I’ll say this, 2 other very popular crafting and art supplies stores are triple the price even with coupons.
What I’ve learned is that seasonal, it’s NOT worth the difference in money. Storage takes its toll on everything after a while.
Trust me, these will last and they look fantastic.
How about a Pretty Let It Snow Wreath with Baubles and Glitter?
The They Look Fantastic – DIY Tabletop Christmas Trees in a Bucket

Yes, it will be about $10 for 3 but, truth be told, I love the Triple Look.
Consider putting these together across a table, a ledge or on a fireplace.
Additionally, if you make 3, you can take one with you as you travel around for a hostess gift.
Make one or make many, this is fast and easy, so let’s get on with the materials and how-to.
Do you LOVE Snowmen? Try out this easy DIY For Fish Bowl Snowmen.
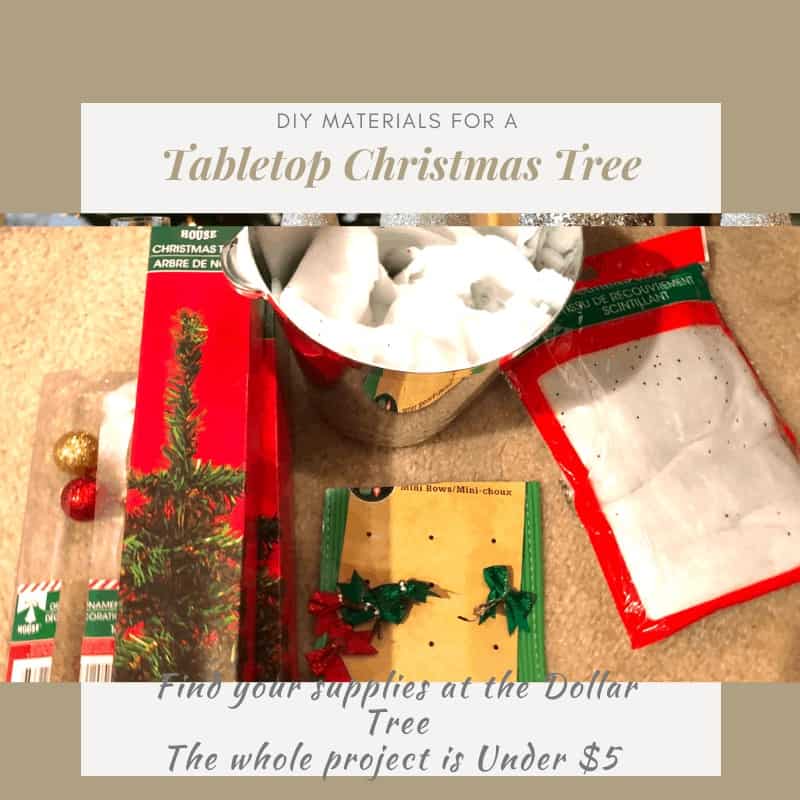
What You Need to Craft A DIY Tabletop Christmas Tree In A Bucket
DIY Tabletop Christmas Tree in A Bucket Under $5
Equipment
- Tools You Will Need
- Hot Glue Gun
- Glue For Gun
- Scissors
- Cover for your Work Surface (Glue issues)
Materials
- A 15 pack of small ornaments. keep the tube they are in
- Holiday Tree 3 if you are making three
- 1 package of holiday garland drape or a used white dishcloth you have since retired.
- Ice Bucket 3 if you are making 3
- TOOLS NEEDED
- Hot Glue Gun
- Glue For Gun
- Scissors
- Cover for your Work Surface Glue issues
- Sparkle Pip Cleaners optional or Tree Ornament Hangers or Paper Clips
Instructions
- Unbox those trees.
- Then, make sure to take the time to carefully spread the branches.
- You can add more branches by purchasing the evergreen strands and tying them in where you want more coverage if the tree is too sparse for your liking.
That's the difference-maker in this DIY. - Make the trees look right and you will love the end result.
Take the ice bucket and set the tree you opened branch by branch into the CENTER of the bucket.
Does it look great? - It should, but we are going to now Balance the tree.
- Remove the tree and set aside.
Open the tube of ornaments and align it on the outside of the bucket. - Mark it for a bit shorter than the bucket.
- Using Scissors cut it just a bit shorter than the ice bucket.
- Next, fasten the tube to the interior of the bucket with hot glue.
- Allow to set up for a minute.
- Then place the tree into the tube that is connected to the bucket.
- Using Scissors, cut a piece of the sparkling garland drape to wrap around the interior bucket tree base.
- However, you can use the tube to keep the wrap up so you won't need as much.
- BULBS NOW
- Don't be overly-generous with bulbs.
- I suggest alternating colors and using sparkle pipe cleaners for ties to secure bulbs.
- For the tube of 15 (if using 3 trees) use no more than 5 bulbs per tree. It's a tabletop tree not the focus tree in the home.
- The idea is for the tree to welcome the season and keep the spirit bright without detracting from all other decor.
- Simple is great.
- I had some small velvet bows (you can buy those at the dollar tree too) already in the house.
- Instead of 'star-topping' the tree, I decided to bow top the tree and kept it very simple.
- Next, place on a ledge, or table or of course gift.
TIPS FOR Sparkle WHITE Cloth
- TIP: If you only want to cover with the white garland sparkle cloth pack the bottom with retailer plastic bags scrunched about.
- Then top off with the garland sparkle cloth. You will need less this way and ONE pack will be more than enough.
- Other Tip: For those making THREE trees. Cut the garland sparkling drape into 1/3's and use 1/3 per tree.
- Once the tree is in the tube, covered with garland sparkle cloth in the bucket, trim it.
Make the DIY Tabletop Christmas Tree in A Bucket Overview
From start to finish this craft took me 5 minutes maximum. The longest part of the crafting was branch straightening.
Branches make the difference in the ‘sparse’ look, yet keep it simply sophisticated.
You don’t need galvanized buckets to make the look, nor do you need to spend much.
However, the return on your small time and small spend to provide a brighter ambiance for the holidays.
Snowman obsessed? Here’s a way to make Crystal-Like Snowmen
Why I Love This Holiday DIY – Upcycling & Recycling
I love this DIY Tabletop Christmas Tree in A Bucket because it is versatile and takes so little time.
Additionally, instead of tossing out the plastic tubing from the ornaments, you upcycle it right into the craft.
Further, if you want to be more eco-friendly, using the plastic bags inside of the bucket to be able to use less garland drape sparkly cloth is perfect.
For those that want to really dive more into eco-friendly, using an old retired, dishcloth is the perfect way to reuse and upcycle.
Truly an inexpensive DIY tabletop Christmas Tree in a bucket to create as compared to many alternatives out there for triple the price. ~ Dana XO


